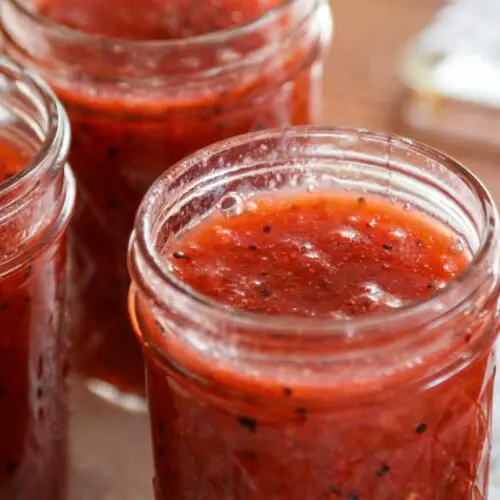
Strawberry Kiwi Jam (Low Sugar)
This is the perfect summertime jam! Sweet strawberries and tangy kiwi combine to make a spread that tastes like candy – but with very little added sugar. And my favorite part - the tiny black kiwi seeds make this look like strawberries in a jar.
Equipment
- Large saucepan
- 2 metal spoons
- Ladle
- Jar funnel optional
- Pint or half-pint mason jars, lids, and rings optional
- Water-bath canner, pressure canner, or large pot for processing optional
Ingredients
- 3 cups chopped strawberries fresh or frozen, about 1.5 pounds
- 3 cups peeled, chopped kiwi about 8 kiwi
- 3-4 tablespoons low- or no-sugar pectin
- ¼ cup bottled lemon juice
- 2 cups sugar
Instructions
- Place two metal spoons into the freezer. These will be used later to check if the jam is set.
- First, prepare the fruit. Wash and hull the strawberries and chop them into small pieces. (If using frozen strawberries, there’s no need to defrost or chop. The frozen fruit will break down as it heats up.) Peel the kiwi and chop into small pieces. Place all of the fruit in a large saucepan.
- Add ¼ cup of water to the fruit and bring to a simmer. Cook for 5-10 minutes until the strawberries and kiwis have softened and released their juices. If you prefer preserves with more texture, continue to the next step. Otherwise, use an immersion blender to partially puree the fruit mixture to the desired smoothness. (Or carefully transfer the fruit to a blender and puree, then put it back in the pot.)
- Mix 3 tablespoons of pectin with about ¼ cup of the measured sugar (to prevent clumping). Add the pectin/sugar mixture and lemon juice to the pureed fruit and bring to a boil. Boil for 1 minute, stirring occasionally.
- Combine the rest of the sugar with the fruit and pectin. Bring to a full boil and allow to cook for 1 minute to ensure the sugar is dissolved, stirring occasionally so the fruit doesn’t burn.
- Check for jell. Remove one of the spoons from the freezer. Scoop up a little jam and give it a few seconds to cool. If the warm jam on the spoon looks viscous and you can see little wrinkles of surface tension, then it’s set. If the jam is still too runny, add 1 more tablespoon of pectin and boil for 1 minute. Check for jell again using the remaining spoon. Repeat as necessary to get the desired consistency.
- After checking if the jam is set, also give it a taste. Now is the time to adjust for sweetness. If you want the jam to be sweeter, add more sugar ¼ cup at a time, always boiling for a minute to make sure the sugar dissolves. Keep in mind that the longer you cook the jam, the more it will lose its fresh, fruity flavor.
Canning instructions:
- Warm the lids in a pan of simmering water for about 5 minutes. This is essential to ensure you get a good seal.
- Set hot, sterilized jars on a towel on the counter. (You can use jars that are hot and clean, not sterilized, but the processing time will be longer.) Ladle the strawberry kiwi jam into the hot jars using a jar funnel. Leave ½ inch of headspace between the top of the jam and the rim of the jar.
- Wipe the rim of the jar clean of any sticky jam residue with a damp cloth. Immediately place a warmed lid on the jar and twist on a jar ring. Don’t over-tighten – some air will need to escape as the jars process.
- Process the jam in fully boiling water that sits at least one inch above the tops of the jars. If you live below 1000 feet, boil sterilized jars for 5 minutes (process non-sterilized jars for 10 minutes). At higher elevations, add 1 minute of processing time for every 1000 feet (so if you live at 7000 feet, process sterilized jars for 12 minutes).
- After the full processing time, turn off the heat and allow the jars to sit in the hot water for about 5 minutes to let the contents settle. Use jar tongs to carefully remove the jars from the hot water, and place them on a towel or cooling rack. Avoid placing the hot jars directly on a countertop or other cool surface as this can cause them to crack. Allow the jars to cool and seal at room temperature for 12-24 hours. After this time, if there are any jars still unsealed (the button at the center of the lid is still popped up), place them in the refrigerator to be eaten first. Store sealed jam jars in a cool, dark pantry for 6 months (although this strawberry kiwi jam is best in the first 3 months).
TIPS
- Jam made with strawberries is notorious for quickly losing its bright freshness due to the volatility of certain flavors. It will also oxidize over time, turning a dull pinkish-brown. Don’t worry – even if the color changes it will still taste delicious!
- I prefer my homemade jam not to be overly sweet so that it tastes as much as possible like the actual fruit. I found that 2 cups of sugar was perfect for this recipe, although it depends on how sweet the strawberries and kiwis are. When in doubt, start with the lowest amount of sugar needed, then add more if you want things a little sweeter.
- The amount of pectin may also change depending on the batch of fruit (all fruit has some amount of natural pectin). Again, start with less and add more as necessary.