
We may receive commissions from purchases made through links in this post, at no additional cost to you.
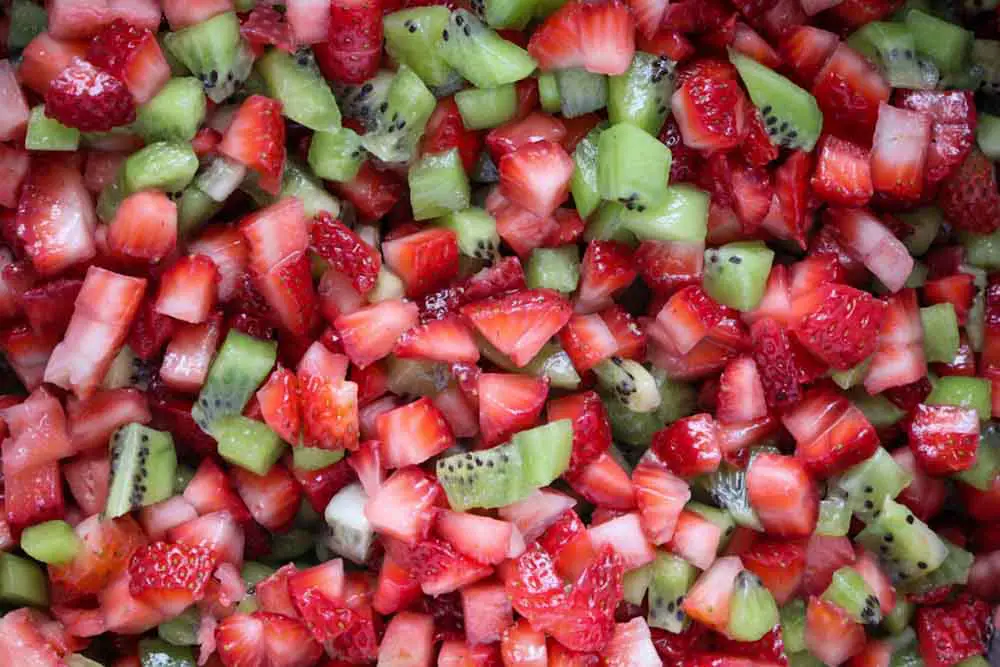
Remember that scene in Ratatouille where the main rat character explains how flavor combinations can be exciting and utterly different than individual ingredients? He imagines little explosions of colors and shapes as he tries to describe what he’s tasting. That’s a little bit about how I feel about the combination of strawberry and kiwi in this jam.
Strawberries are bright, fruity, and (hopefully) sweet, while kiwis are tangy and tropical. Strawberries and kiwis together in this low-sugar jam combine to taste a lot like Jolly Ranchers – but if Jolly Ranchers were made with fresh fruit.
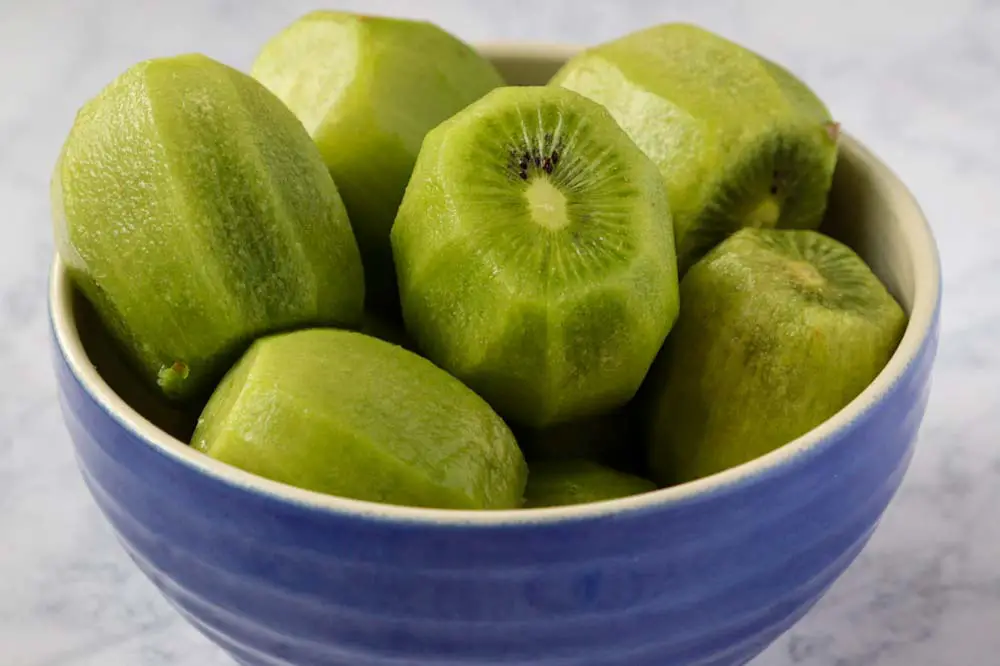
Speaking of fresh fruit, I made a discovery recently that there is a kiwi trial garden in my city. I live near Stephen F. Austin State University (SFA) which has extensive horticultural, forestry, and agriculture programs. The school runs several fruit test gardens that are sometimes open to the public for picking.
We picked muscadine grapes at the test garden near us (visit this article to see how I make my easy Muscadine Grape Jam). The kiwi garden isn’t open for public picking yet, but how great will it be to pick locally grown kiwis! Kiwi is a tropical fruit, but SFA is currently testing some cold-hardy varieties in our subtropical, zone 8b climate. You can bet I’ll be adding some kiwi vines to my backyard Fruit Grove as soon as possible…
Strawberry picking farms are a lot easier to find than pick-your-own kiwis, thankfully. If you can find a farm that sells fresh strawberries near you, I highly recommend picking some up. Or visit a farmers market for some berries grown close to home.

Even better, grow your own strawberries! There are varieties available for every climate, even my hot, humid area. Growing strategies may be different depending on where you live – for example, strawberries have trouble making it through the summer in our extreme Texas heat, so we treat them as annuals and focus on June-bearing varieties.
But of course, there is absolutely nothing wrong with using strawberries and kiwis from the grocery store. Wherever you source your fruit, jam that you make yourself will taste FAR superior to anything you can buy off the shelf.
Using Frozen Fruit
It always seems that I end up with more fruit in the summer than I have time to deal with, either from my own garden or great deals I find at the grocery store (99 cents for a pint of strawberries? Don’t mind if I do.). Berries, in particular don’t stay fresh for very long in the refrigerator.
Related: How to Wash and Store Blackberries to Stay Fresh Longer
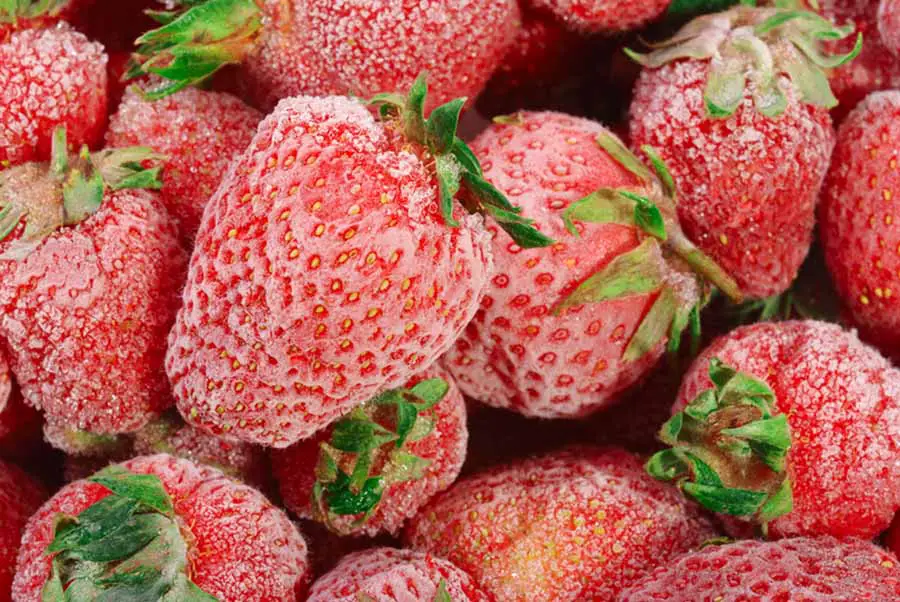
Thankfully, freezing strawberries works great. Just wash and hull them, spread them on a baking tray, and freeze until solid. Put the berries in a freezer bag or container and you have flash-frozen berries for months.
Frozen berries are perfect for making jam (home frozen or store-bought). You don’t even need to defrost them since the first step is to cook the strawberries and kiwis together. Frozen fruit will get mushy once defrosted, since ice crystals break down the texture. This is no problem when making jam, since you’ll be cooking, mashing, and/or blending the fruit.
I always freeze fresh-picked summer berries from my garden so I don’t have to preserve them right away. It’s HOT in the summer where I live, so the last thing I want to do is spend the day steaming up the kitchen as I sanitize and process jam jars.
So, freeze the fruit and make homemade jam once the weather cools down. Then instead of being a steamy chore, it’s a cozy part of fall. Plus I have fresh-tasting jam to last the winter.
Why use low-sugar pectin?
Every fruit has some amount of natural pectin. Pectin is simply a soluble fiber that exists in fruits to bind cell walls together. It’s often added in preserving to help jams set without having to be boiled for so long. Jam made without pectin often needs a lot of sugar to help it set.
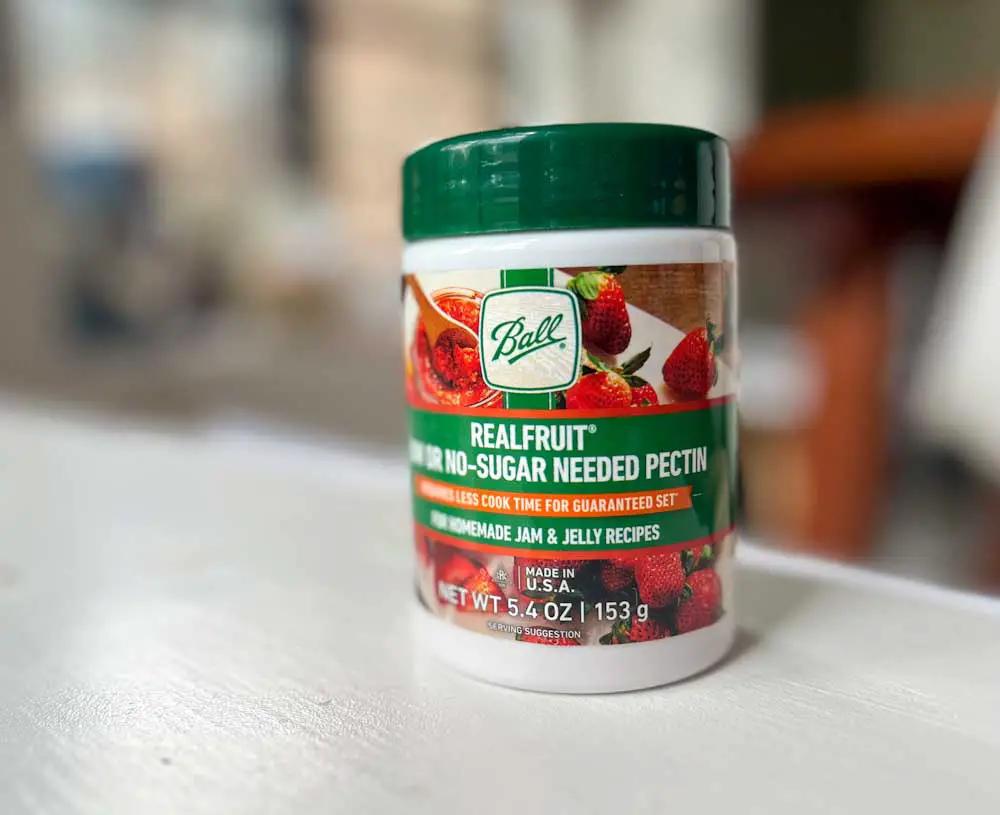
Low- or no-sugar pectin is the same as regular fruit pectin, but it has the ability to thicken preserves without tons of sugar. This keeps the bright, fresh flavors of the actual fruit. And, of course, lower sugar makes this a much healthier option than most store-bought jams.
One difference in using low-sugar pectin is that some added acidity is necessary to help it thicken. In this recipe, I use lemon juice for acidity. Its best to use bottled lemon juice for this purpose, because it has a predictable amount of acid. Actual lemons can vary widely in acidity levels (Meyer lemons, for example, have a much lower acidity than many other lemons).
How long will the jam last in the fridge or freezer?
Homemade jam lasts up to two weeks in the refrigerator, and up to 3 months in the freezer. If your family is like mine, they will have no trouble getting through a few pints of jam in a short time! Simple toast with butter and jam is a breakfast staple for us on busy weekday mornings.
If you want your jam stash to last 6 months or longer, then canning is the way to go. I’ve included canning instructions in the recipe below. A note of warning – any jam made with strawberries tends to lose its bright red color over time (and a certain amount of its bright flavor). Strawberry Kiwi Jam with faded color will still taste delicious, however!
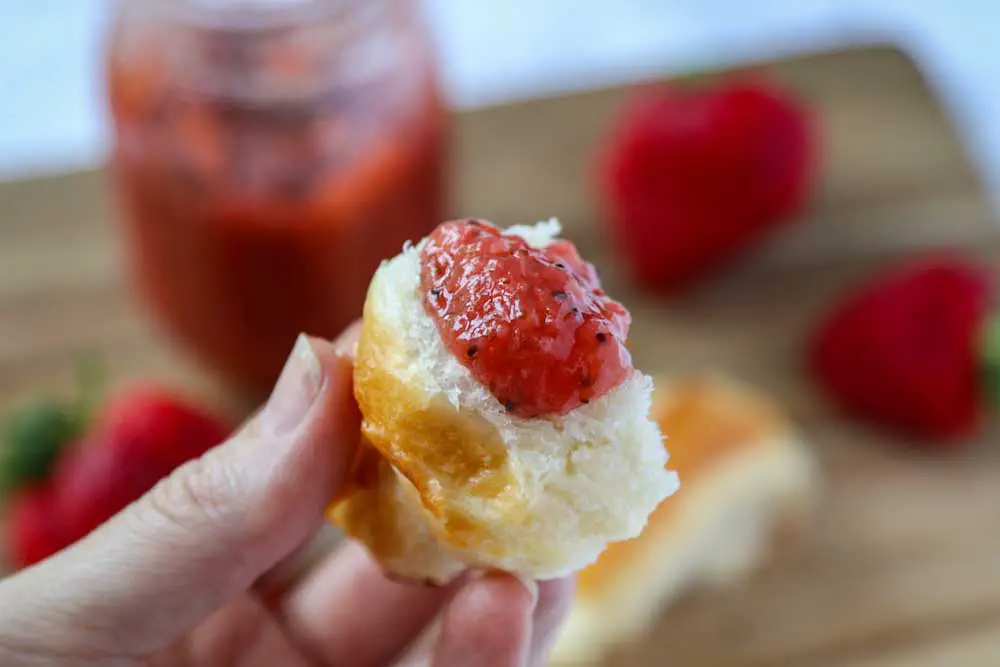
I prefer to eat this simply, on a croissant, biscuit, or a slice of toasted good-quality bread. Or make some simple turnovers with store-bought or homemade pie crust. Or go for it – just spoon it over ice cream!
Strawberry Kiwi Jam (Low Sugar)
Equipment
- Large saucepan
- 2 metal spoons
- Ladle
- Jar funnel optional
- Pint or half-pint mason jars, lids, and rings optional
- Water-bath canner, pressure canner, or large pot for processing optional
Ingredients
- 3 cups chopped strawberries fresh or frozen, about 1.5 pounds
- 3 cups peeled, chopped kiwi about 8 kiwi
- 3-4 tablespoons low- or no-sugar pectin
- ¼ cup bottled lemon juice
- 2 cups sugar
Instructions
- Place two metal spoons into the freezer. These will be used later to check if the jam is set.
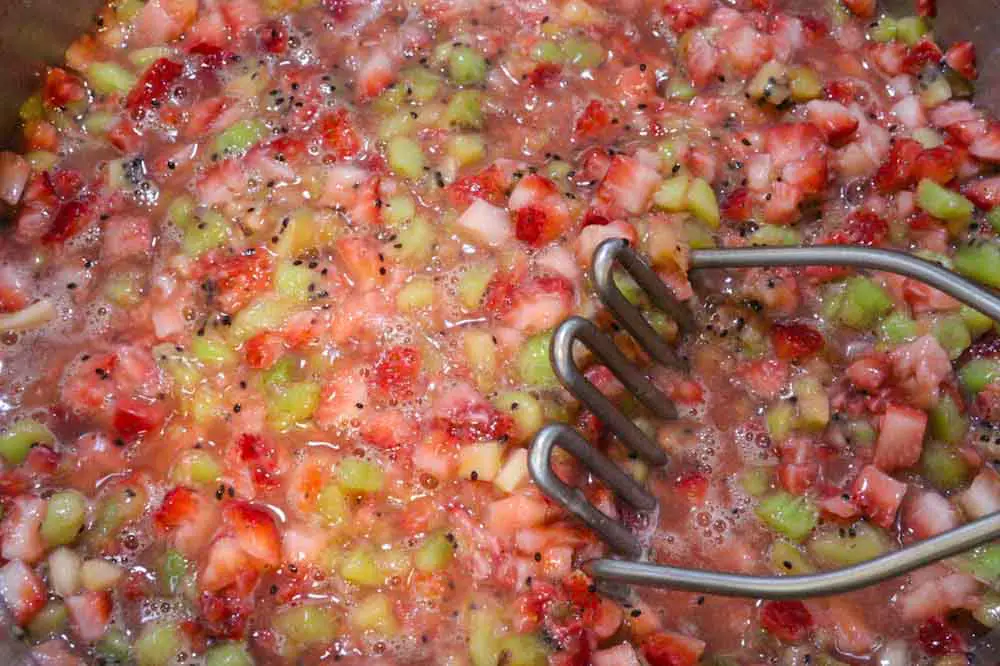
- First, prepare the fruit. Wash and hull the strawberries and chop them into small pieces. (If using frozen strawberries, there’s no need to defrost or chop. The frozen fruit will break down as it heats up.) Peel the kiwi and chop into small pieces. Place all of the fruit in a large saucepan.
- Add ¼ cup of water to the fruit and bring to a simmer. Cook for 5-10 minutes until the strawberries and kiwis have softened and released their juices. If you prefer preserves with more texture, continue to the next step. Otherwise, use an immersion blender to partially puree the fruit mixture to the desired smoothness. (Or carefully transfer the fruit to a blender and puree, then put it back in the pot.)
- Mix 3 tablespoons of pectin with about ¼ cup of the measured sugar (to prevent clumping). Add the pectin/sugar mixture and lemon juice to the pureed fruit and bring to a boil. Boil for 1 minute, stirring occasionally.
- Combine the rest of the sugar with the fruit and pectin. Bring to a full boil and allow to cook for 1 minute to ensure the sugar is dissolved, stirring occasionally so the fruit doesn’t burn.
- Check for jell. Remove one of the spoons from the freezer. Scoop up a little jam and give it a few seconds to cool. If the warm jam on the spoon looks viscous and you can see little wrinkles of surface tension, then it’s set. If the jam is still too runny, add 1 more tablespoon of pectin and boil for 1 minute. Check for jell again using the remaining spoon. Repeat as necessary to get the desired consistency.
- After checking if the jam is set, also give it a taste. Now is the time to adjust for sweetness. If you want the jam to be sweeter, add more sugar ¼ cup at a time, always boiling for a minute to make sure the sugar dissolves. Keep in mind that the longer you cook the jam, the more it will lose its fresh, fruity flavor.
Canning instructions:
- Warm the lids in a pan of simmering water for about 5 minutes. This is essential to ensure you get a good seal.
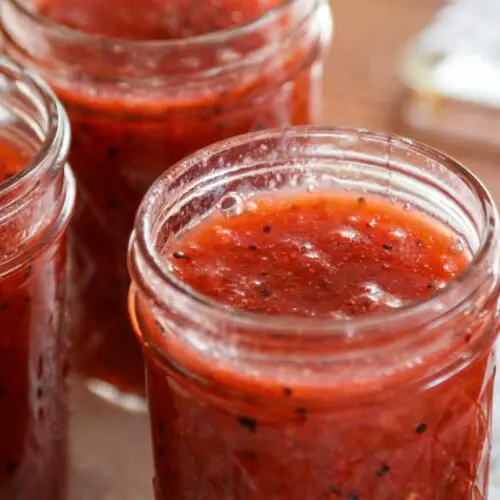
- Set hot, sterilized jars on a towel on the counter. (You can use jars that are hot and clean, not sterilized, but the processing time will be longer.) Ladle the strawberry kiwi jam into the hot jars using a jar funnel. Leave ½ inch of headspace between the top of the jam and the rim of the jar.
- Wipe the rim of the jar clean of any sticky jam residue with a damp cloth. Immediately place a warmed lid on the jar and twist on a jar ring. Don’t over-tighten – some air will need to escape as the jars process.
- Process the jam in fully boiling water that sits at least one inch above the tops of the jars. If you live below 1000 feet, boil sterilized jars for 5 minutes (process non-sterilized jars for 10 minutes). At higher elevations, add 1 minute of processing time for every 1000 feet (so if you live at 7000 feet, process sterilized jars for 12 minutes).
- After the full processing time, turn off the heat and allow the jars to sit in the hot water for about 5 minutes to let the contents settle. Use jar tongs to carefully remove the jars from the hot water, and place them on a towel or cooling rack. Avoid placing the hot jars directly on a countertop or other cool surface as this can cause them to crack. Allow the jars to cool and seal at room temperature for 12-24 hours. After this time, if there are any jars still unsealed (the button at the center of the lid is still popped up), place them in the refrigerator to be eaten first. Store sealed jam jars in a cool, dark pantry for 6 months (although this strawberry kiwi jam is best in the first 3 months).
TIPS
- Jam made with strawberries is notorious for quickly losing its bright freshness due to the volatility of certain flavors. It will also oxidize over time, turning a dull pinkish-brown. Don’t worry – even if the color changes it will still taste delicious!
- I prefer my homemade jam not to be overly sweet so that it tastes as much as possible like the actual fruit. I found that 2 cups of sugar was perfect for this recipe, although it depends on how sweet the strawberries and kiwis are. When in doubt, start with the lowest amount of sugar needed, then add more if you want things a little sweeter.
- The amount of pectin may also change depending on the batch of fruit (all fruit has some amount of natural pectin). Again, start with less and add more as necessary.
