
We may receive commissions from purchases made through links in this post, at no additional cost to you.
An impromptu trip to my local nursery led to me “accidentally” come home with a new plant friend…a ‘Razzmatazz’ grapevine! This table grape variety is vigorous, disease resistant, heat tolerant, and delicious, which is exactly what I needed. The only problem was…I had nothing for it to grow on.
And so this grape arbor project was born. I’ve wanted a climbing trellis archway for my garden entry ever since we built this simple DIY fence. So this was the perfect opportunity to come up with a sturdy, inexpensive, and beautiful arbor design. Read on (or watch the video below) to see how we did it!
What You’ll Need
One of the ways we kept costs down (under $150!) was by using pressure-treated pine instead of a more expensive option. A naturally rot-resistant wood, such as cedar or redwood, would perhaps be a better choice, but expect to pay a lot more money for good-quality hardwood.
- 4 (8-foot) 4×4 posts
- 4 (8-foot) 2×6 boards
- 3 (8-foot) 2x4s
- 2 (3.5′ x 7′) sheets of steel wire mesh (used to reinforce concrete). You can also use cattle panels, which are even sturdier, but more expensive.
- wire staples
- deck screws
- pocket hole jig
- High-strength concrete mix (I used Quikrete)
- asphalt fence paint
Step 1: Make Cuts and Assemble
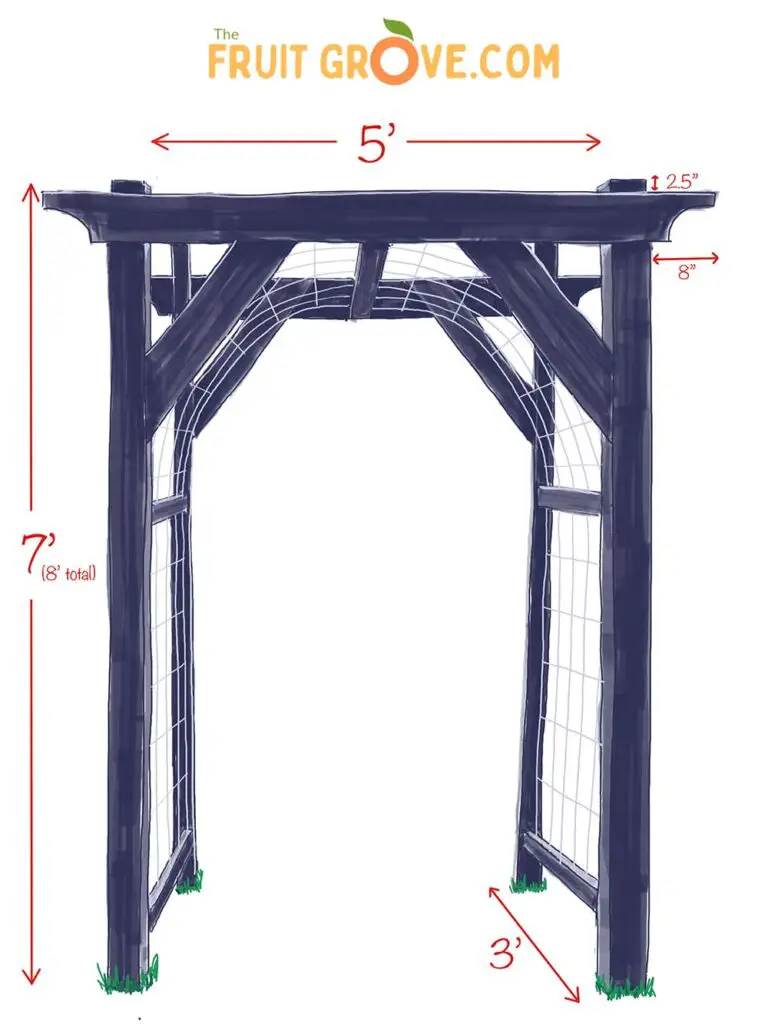
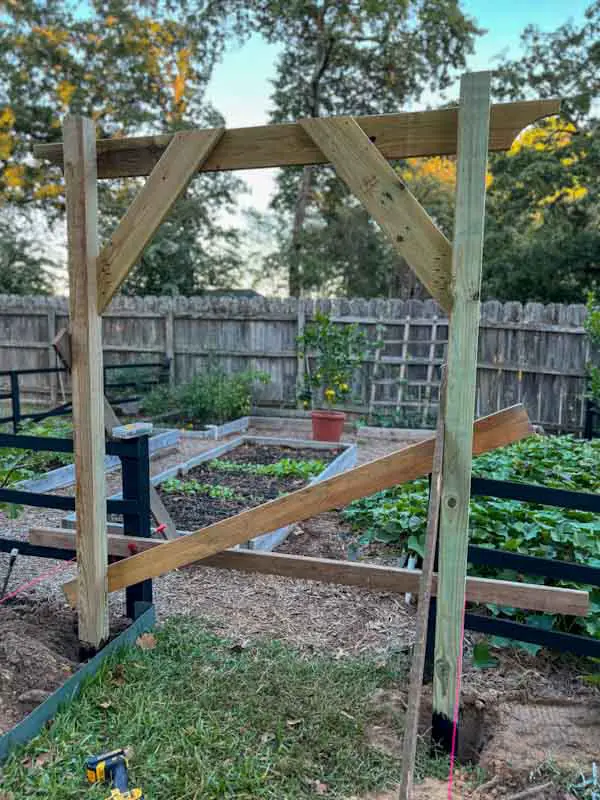
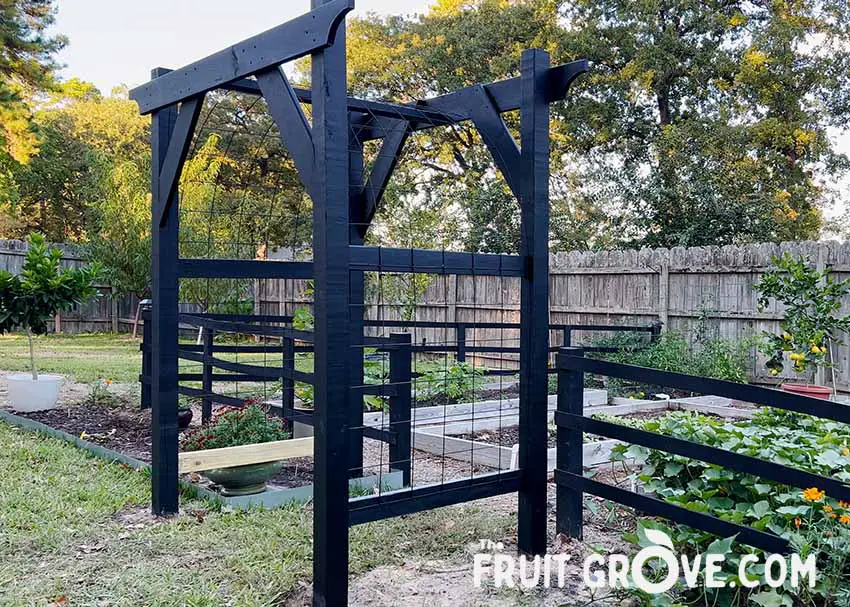
Below is the overall design and dimensions for the grape arbor. The entire structure is about 7 feet tall (8 foot posts set about one foot into the ground) and about 5 1/2 feet wide.
We decided to assemble each archway separately, then place them and attach them together on site in the garden.
The first thing we did was cut the two top horizontal 2×6 boards to length. Each was 83 inches long, which allows for each board to extend past the posts by about 8 inches on either end.
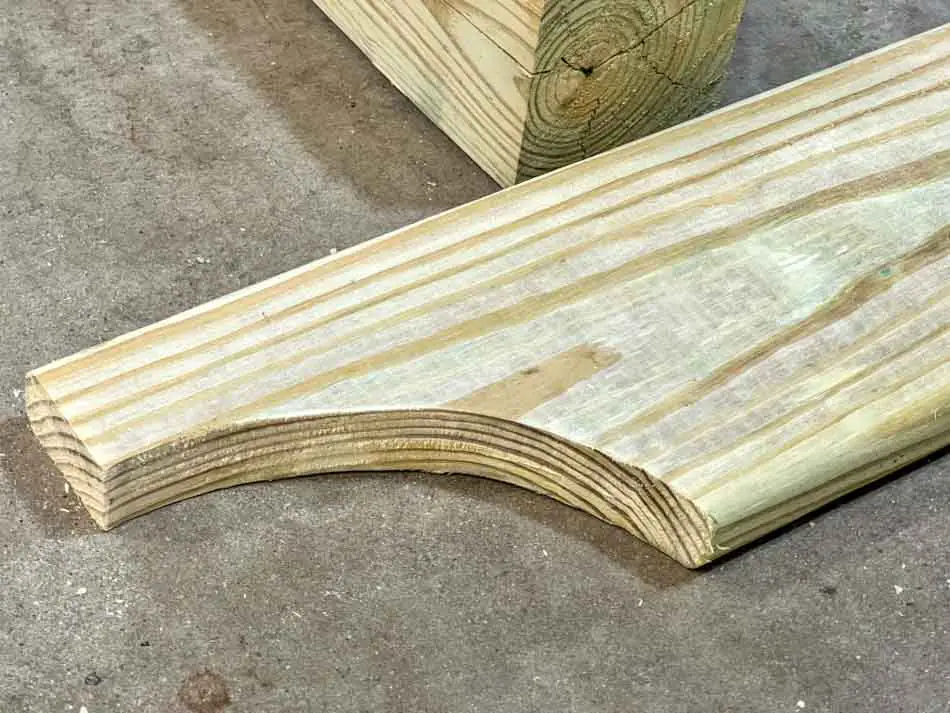
I sketched out a curve design on the bottom of a scrap piece of board. We then traced the curve onto the ends of the cut 2x6s, so that the cutout was on the bottom side. We cut out the curve with a jigsaw and used a router with a flush trim bit to smooth it out (you could also just use sandpaper).
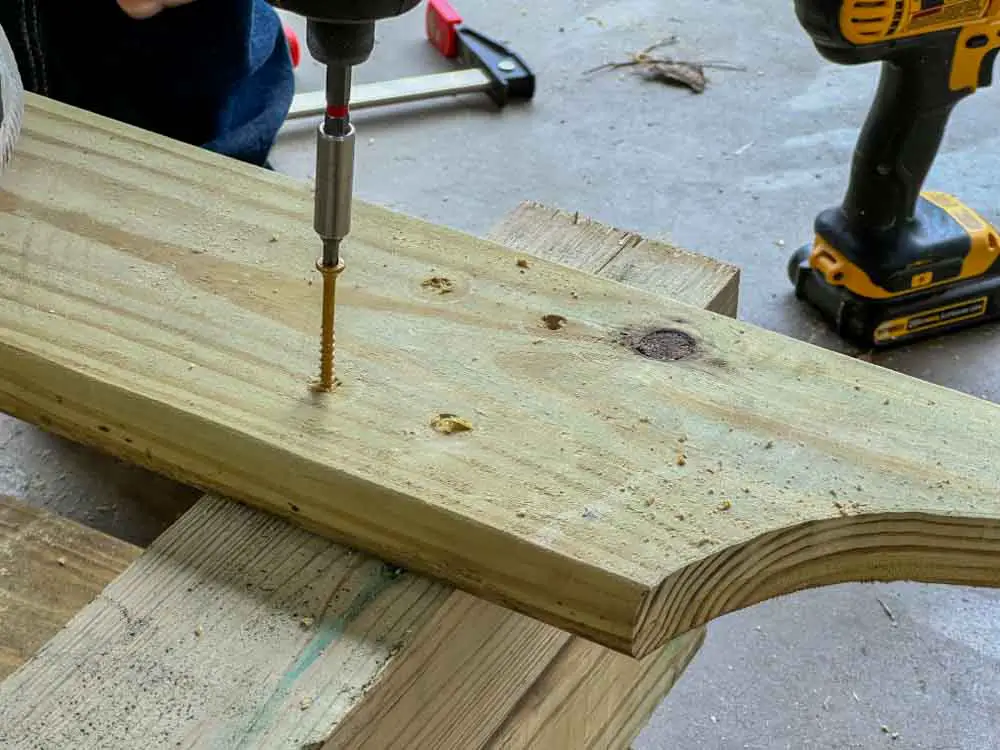
Then we laid out two of the posts onto the ground 5 feet apart, and placed one of the cut 2x6s on top. The ends of the horizontal 2×6 went 8 inches past the posts, and the tops of the posts stuck up 2.5 inches above the top of the 2×6. After checking that everything was square (at a right angle), we pre-drilled some holes and used 4 deck screws to attach the 2×6 to the posts.
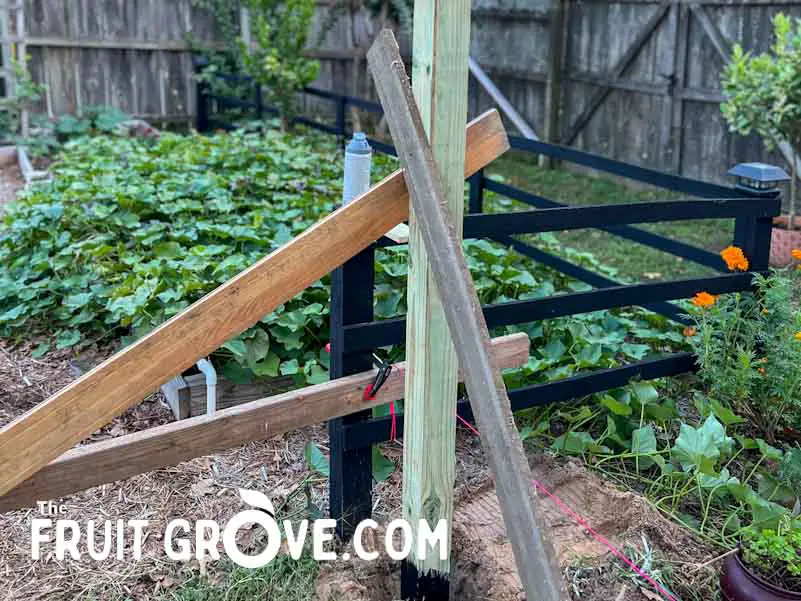
The next step was to cut, place, and attach the diagonal support pieces. We first eyeballed the placement of the diagonal 2×6 pieces to make it look right, then cut them to length (using the remaining 2 uncut 2×6 boards).
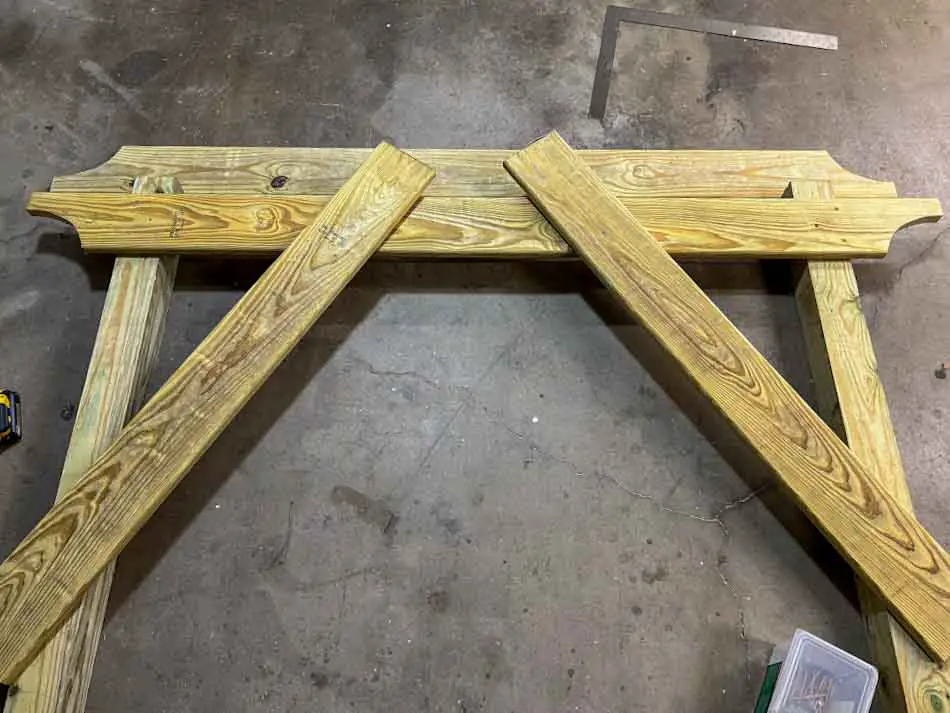
The diagonal pieces ended up being placed so the top edge was 12 inches below the horizontal top boards, and 9 inches from the inside edge of the posts (see the sketch above).
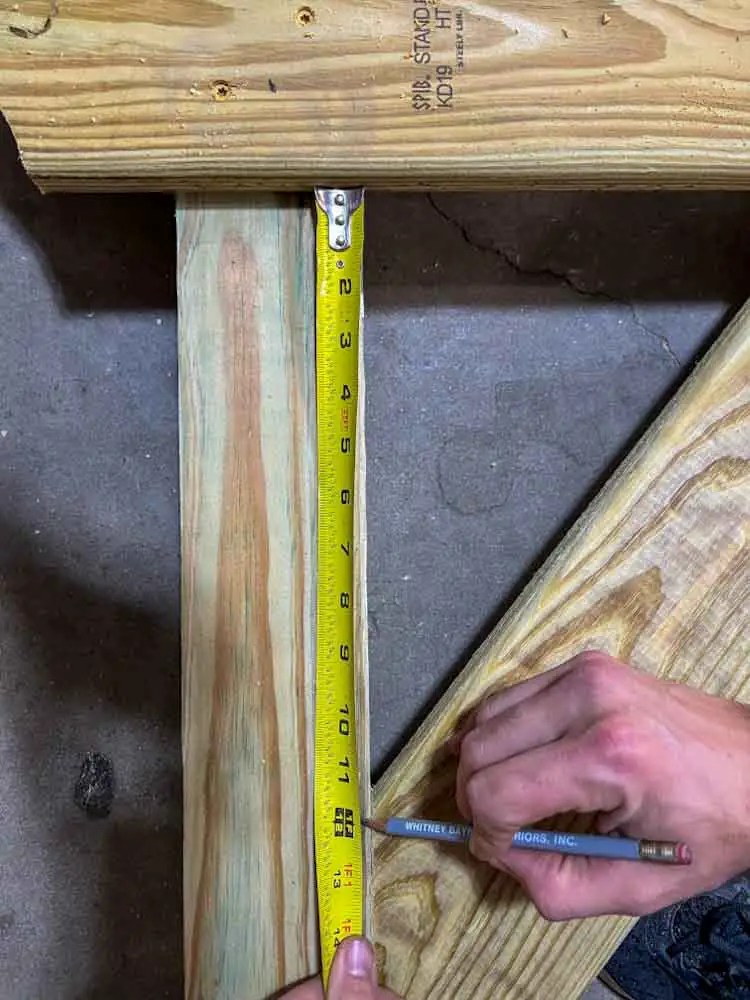
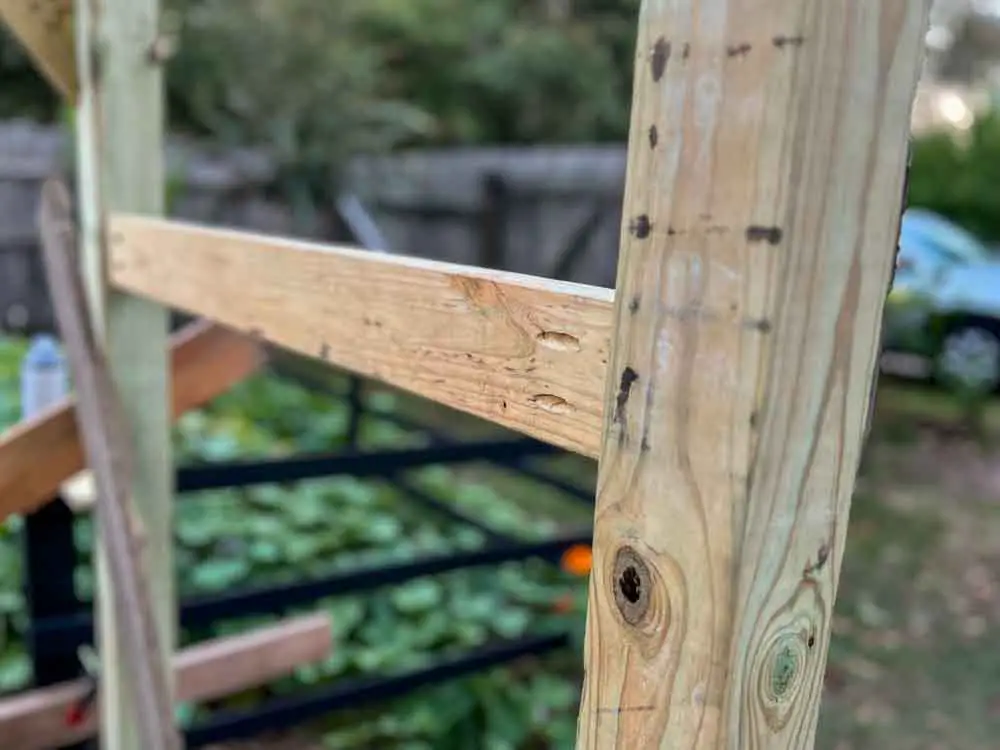
We attached the diagonal 2x6s using deck screws. The side of the diagonal piece went into the side of the post with pocket screws, and the top of the diagonal piece was screwed directly into the back of the top horizontal 2×6. (You can see this in the picture below.)
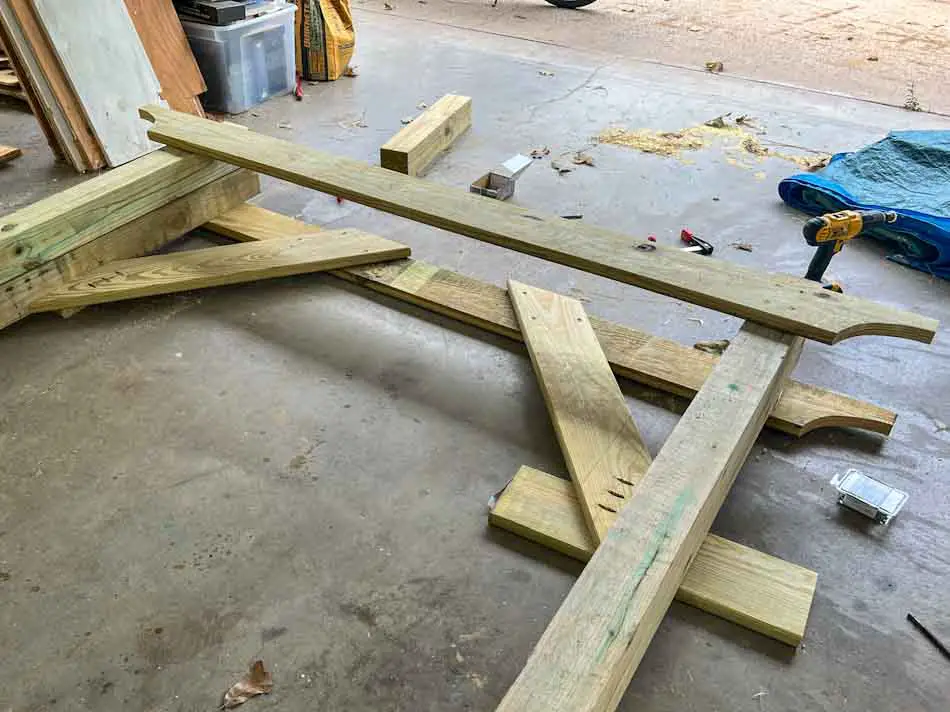
We then repeated the same process with the other archway, using the remaining posts and 2×6 pieces. Once the arbor ends were assembled, it was time to lug them to the garden and get them in place.
(Before assembling the arbor in the garden, I painted the bottom foot or so of each post with asphalt paint. This paint protects wood fence posts from ground contact, and it will help the arbor last a lot longer. If I skipped this step, I could count on termites or water damage rotting the posts in just a couple years.)
Step 2: Finalize Layout and Dig Holes
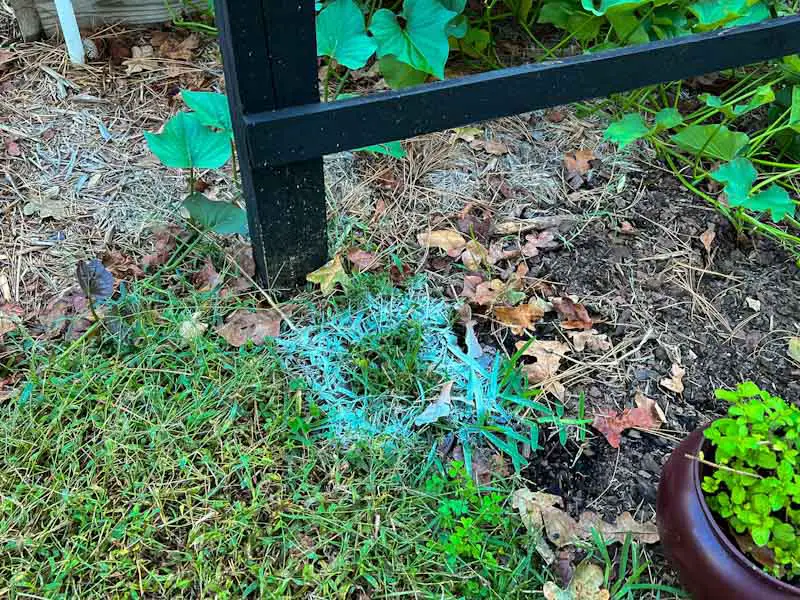
The next thing we did was head out to the garden and mark where to dig the holes. We knew the posts would be 5 feet apart from inside edge to inside edge, so we centered the post holes on our garden fence opening.
We dug each hole about 12 inches deep, which is the depth the posts would be sunk into the ground. Our backyard is very uneven, however, so we used some stakes and string to ensure that the holes would be level. Once we made sure the string was level, we then measured from the string down into each hole, and adjusted the hole depth so that all four posts would end up level.

Below you can see how we clamped a board across the fence opening, pounded in some stakes, and strung a level line. We measured from string to string to make sure that the posts of each end of the trellis were 5 feet apart, with 3 feet between the front and the back of the arbor.
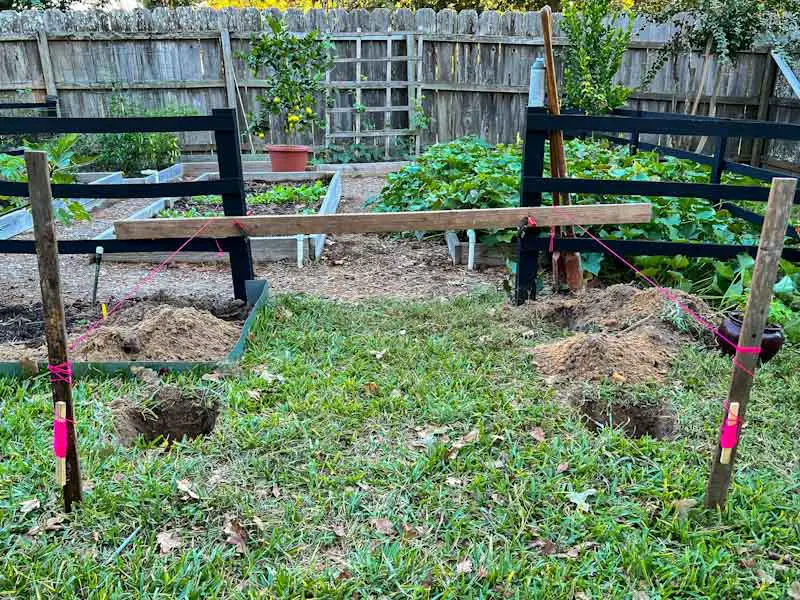
Once we were confident that the holes were the right depth and in the right spots, we inserted one of the assembled archways. We double checked that the posts were level and even, then screwed in some stabilizing boards so the archway would stay in place while the concrete set. Each board was pounded into the ground a few inches so the post wouldn’t move.
Step 3: Set Posts
Below you can see the first archway set into place and stabilized. The next step was adding concrete to each hole. We poured dry concrete mix into the holes around the posts until the concrete was about 4-6 inches deep. Using the hose, we wet the concrete mixture thoroughly and left it to set overnight.
We set up the second archway the same way, double checking that everything was level and even. We measured carefully to be sure that the space between the two archways was 3 feet. We set the archway in place, anchored it with support boards, and filled the holes with a few inches of concrete and water.
The next day, after the all the concrete was set, we backfilled the holes the rest of the way with soil, tamping down firmly.
Step 4: Attach Arbor Together
Almost done with assembly – time to attach the two archways together. We measured the space between the arches about halfway up the posts and cut two 2×4 pieces to fit. (There will eventually be two support pieces on each side of the arbor, one halfway up each side, and one near the bottom of each side).
*Important – Measure and attach the only the side 2×4 support pieces at this time, using pocket screws. Wait to measure and attach the bottom support pieces until you see how far the wire mesh extends down the sides (Step 6).
We measured for a cross support right at the top of the trellis, running between the horizontal 2×6 boards. We cut a 2×4 to length, and attached it using pocket screws.

Step 5: Paint Arbor (Optional)
As I mentioned before, we chose to use inexpensive pressure treated lumber to save on costs. I decided to paint the wood to protect it from the elements, and to make it look nicer and match our garden fence.
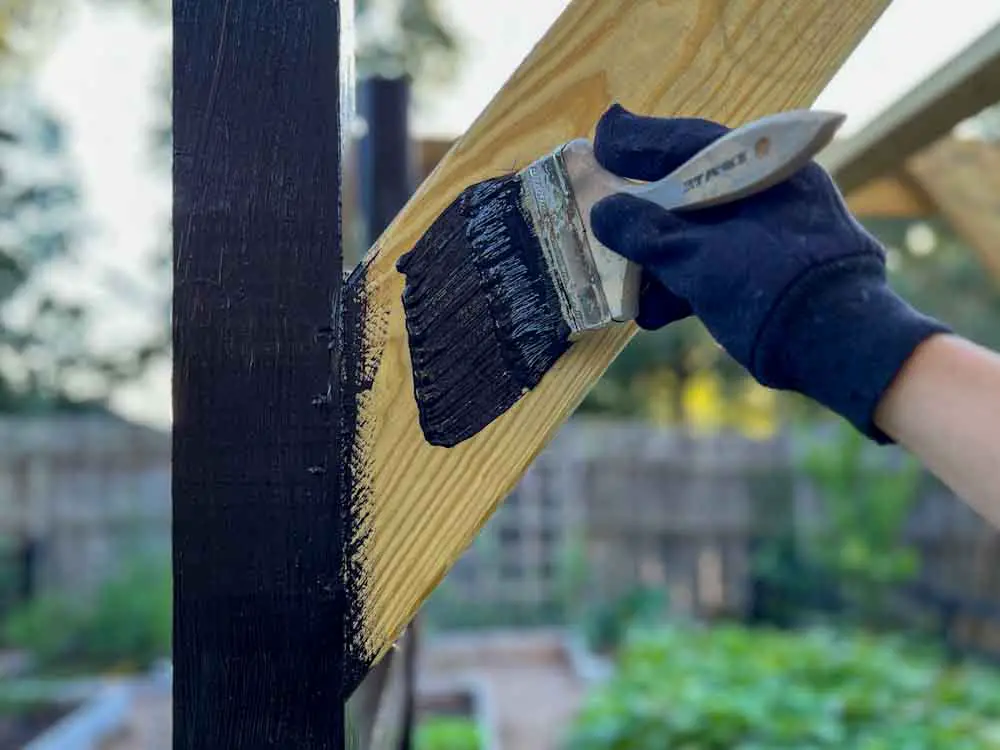
I used black asphalt paint, which is meant to protect fence posts that are buried in the ground. I had painted the bottom of the posts before setting them into the ground. I then painted the entire archway with the paint to protect it (and make it look a lot more attractive!).
If you’re concerned about the paint being near plants, then you can absolutely skip this step. If you use pressure treated pine, like me, you will want to paint the portion of the posts that are set into the ground, however.
My grapevine won’t be climbing directly on the wood, so I decided to go for it. I live in an extremely hot, humid, buggy climate that is either very wet or very dry, so I knew I needed to protect the arbor to help it last as long as possible.
Step 6: Attach Mesh Trellis
Before attaching the mesh panels, I scrubbed them with some steel wool and CLR to get off any rust. I then sprayed them with a rust-protecting paint like this one to prevent them from rusting again.
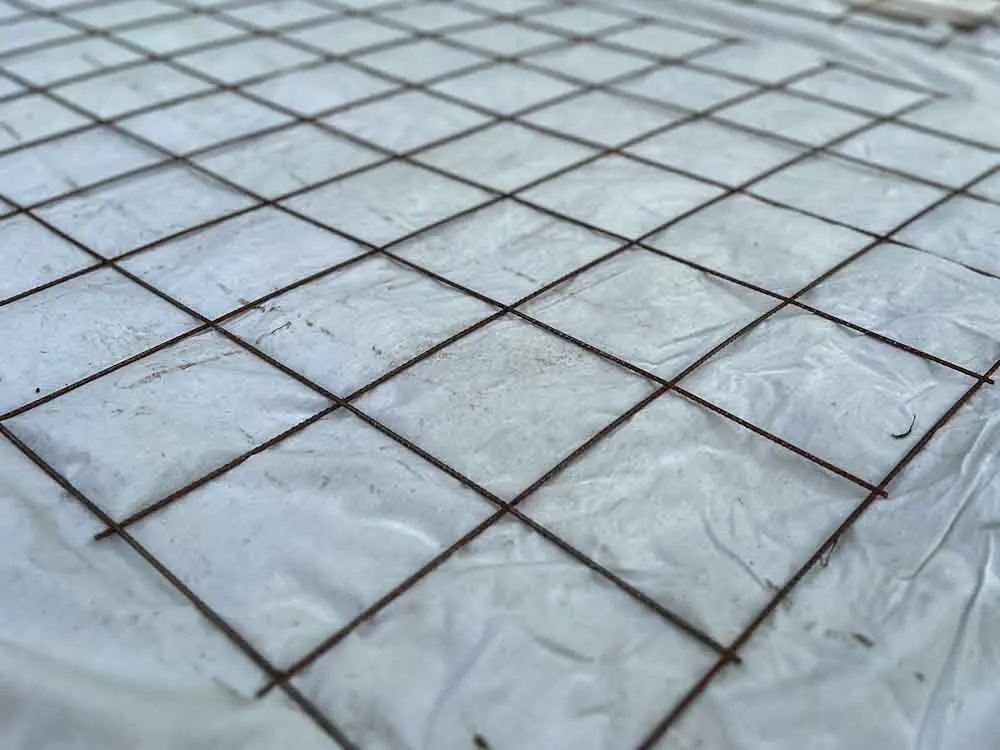
Just like with the paint on the arbor, you can absolutely skip this step. I love the look of the wire re-mesh, but I know it will rust out in the elements if I don’t protect it.
We did have to trim our 3 1/2-foot mesh sheet by one row of squares to make it fit our 3-foot-deep arbor. We used an angle grinder to carefully cut the wires, which worked well.
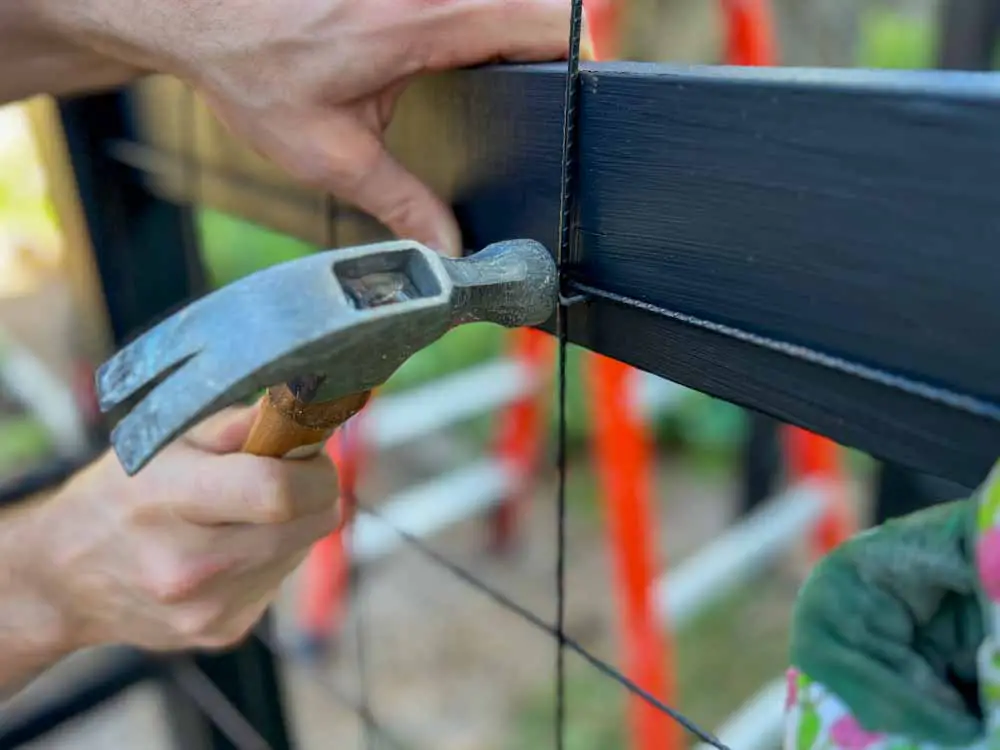
After the mesh was cleaned and prepped, it was time to attach it to the arbor using some wire staples. Each panel was attached first to the top support 2×4, then curved downward and attached to the outside of the side 2×4 support pieces.
Once you see how far down the mesh panel reaches, you can measure for the final 2×4 support pieces. Place these low supports where you can attach the bottom of the mesh to them. Attach the supports with pocket screws, then use wire staples to secure the mesh.
Step 7: Plant Grapevine
This is what I’ve been waiting for – finally seeing the vigorous ‘Razzmatazz’ grapevine climb up my new arbor archway.
Planting the grapevine was simple. I always try to amend my soil as little as possible so that whatever I’m planting has a chance to adapt to my native soil. But, as my soil is almost entirely sand, I did have to mix in some compost at the planting site.
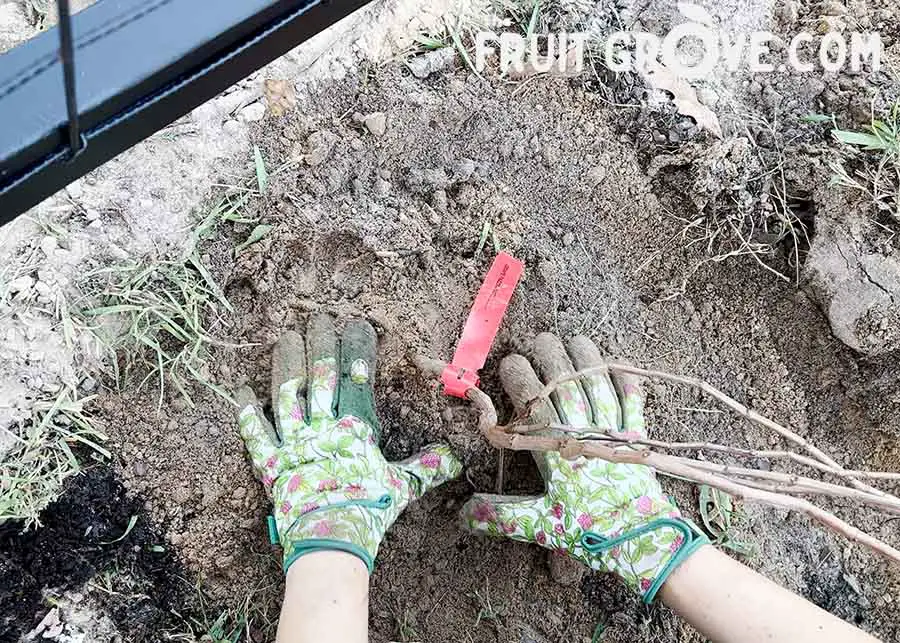
Once I dug my hole, backfilled with soil and compost, tamped down firmly, and watered in the grapevine, I then had the fun of twining the vines through the wire mesh on the arbor. Even though it’s fall and the vine is slowing down for the season, I’m already so pleased with how it looks!
My one ‘Razzmatazz’ grapevine should have no problem filling up this entire trellis, but I reserve the right to plant another grapevine (or other climbing plant) on the other side. We’ll have to see how it goes! Right now, I can sit back and enjoy looking at my beautiful new arbor leading into the garden. Pretty soon I’ll even taste the “fruits” of my labor…
