We may receive commissions from purchases made through links in this post, at no additional cost to you.
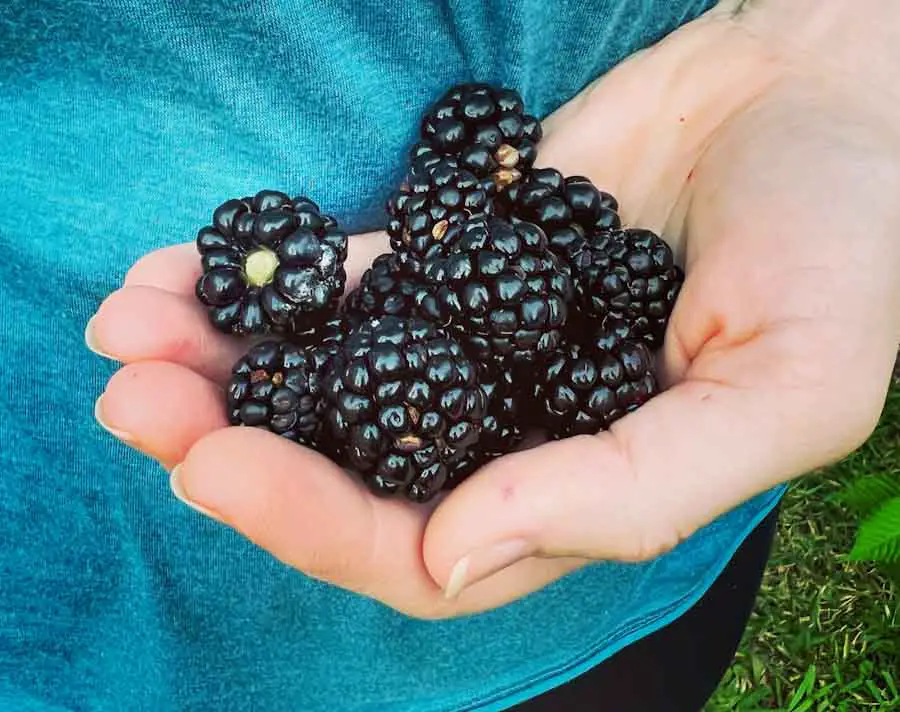
I have a small blackberry patch near our driveway, and every summer it becomes a part of our family routine to check for ripe berries as we get in or out of the car. At first, we only pick a few berries – enough to just quickly rinse in the hose and eat right away. But as the weeks go on, a few turns into a handful, then two handfuls…then more than you can carry!
Over the years, I’ve settled on my favorite things to make when blackberry season comes around: preserves, cobbler, scones, and tons of frozen blackberries for later recipes and smoothies. But before we can enjoy any of these treats, the first step is to wash the berries to get off any dirt (or critters) that might be clinging. After that, it’s a matter of storing the blackberries correctly so the fresh-picked taste lasts as long as possible.
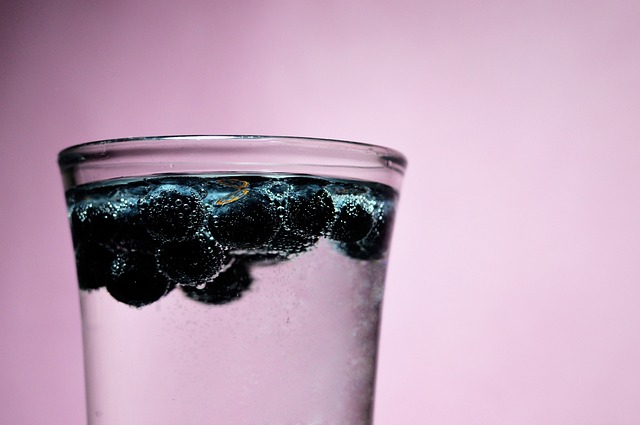
To wash blackberries, swish them in a bowl of cool water or a 3:1 water-vinegar mixture. Swish again gently with clean water to remove any clinging dirt or insects. Let the berries dry completely at room temperature before storing in the refrigerator or freezer.
There are a lot of ways you can wash and store blackberries. For me, it’s a matter of doing it the simplest, but most effective way. After waiting all year for blackberries to be in season, either in the store or in my own blackberry patch, I want them to last as long as possible – preferably bug-free!
Washing Fresh-Picked or Store-Bought Blackberries
The key to washing fresh-picked blackberries is to drive out any insects or larvae that might be hiding. I know that sounds disgusting, but…nature, right?
You might sometimes see tiny worms that are the larvae of fruit flies (which are the bane of my existence every summer). Although they are safe to eat (ew), I’d certainly rather not. Washing blackberries correctly gets rid of all the little bugs and dirt that may be present.
Store-bought blackberries may also have some insects, although it’s less likely. But it’s still a good idea to do more than just rinse them quickly under the tap. For one thing, blackberries are fragile, and the force of the tap water may damage the berries.
I typically only wash store-bought blackberries right before I use them. They tend to stay fresh longer if they remain unwashed (keep reading for more details on storing blackberries). For my homegrown blackberries, though, I do recommend washing them right away before storing, to keep any bugs out of the refrigerator!
Washing blackberries with only water will effectively clean them. However, adding some vinegar to the water may have benefits. Vinegar not only cleans the surface of the berries, but it can also kill mold and helps draw out insects or larvae. A vinegar wash also makes the berries last longer in the refrigerator than water alone.
How to Wash Blackberries:
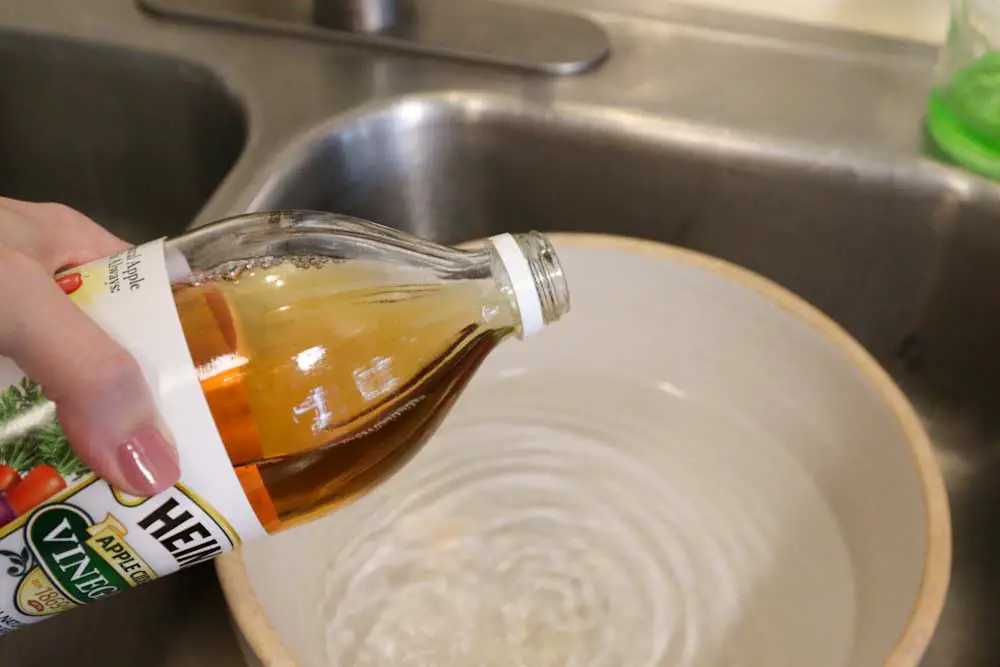
- Soak. Fill a bowl with clean, cool water. Add apple cider vinegar (or white vinegar) if desired – 3 parts water to 1 part vinegar. Gently swish the berries in the water with your fingers until you see bits of dirt, etc. floating to the top. Leave fresh-picked berries to soak in the solution for 5-10 minutes.
- Pour or scoop off the bits of dirt and bugs that are floating at the top of the bowl. Strain the berries in a colander, rinse the bowl, and refill with water. Do at least one more good swish in the clean water to be sure the blackberries are completely clean and to remove any vinegar smell or taste. I usually soak my fresh-picked blackberries two or three times. Store-bought blackberries will probably only need to be washed once or twice.
- Dry. After the blackberries have drained in the colander, carefully spread them out in a single layer on a towel laid out on the counter. Use another towel (or paper towel) to gently blot off the excess water. Then allow the blackberries to fully air-dry on the towel – this may take an hour or more. If you want your berries to last, they must be completely dry before storing in the refrigerator or freezer.

Storing Blackberries So They Last a Long Time
We all know that blackberries (and other berries) can spoil quickly, no matter what you do. But there are a few ways to keep them fresh and firm for as long as possible, depending on how you store them.
Blackberries will last the longest in the freezer, but they can stay fresh in the refrigerator for a week or more if stored properly. For even more versatility, store blackberries in other forms, such as frozen puree, dehydrated, or preserved whole or as a jam.
In the Refrigerator
If you know your store-bought blackberries will be eaten in the next few days, there’s nothing wrong with refrigerating them in the container in which you bought them. I usually wash store-bought berries right before I eat them. Unwashed berries in the original container will usually last 3-5 days in the refrigerator.
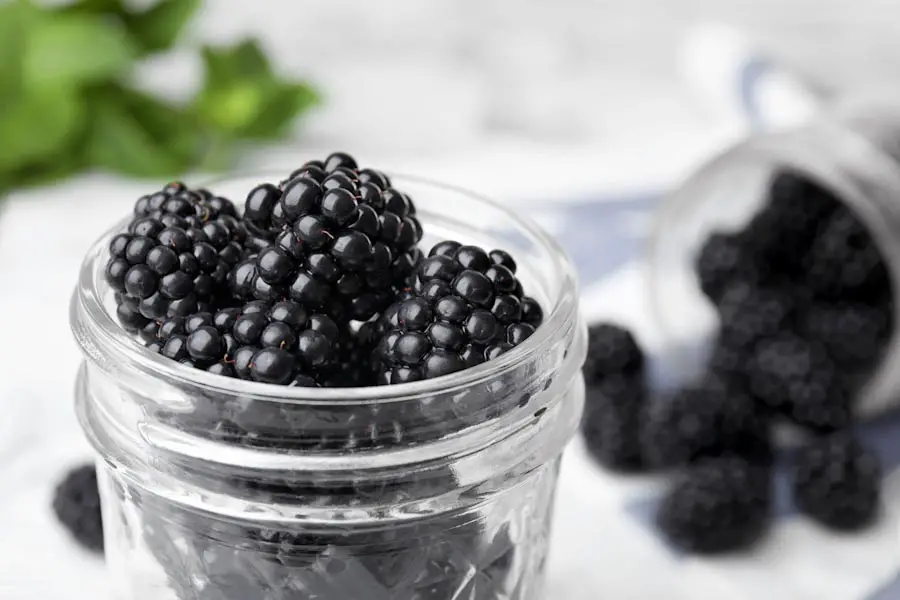
To help them last even longer, store blackberries in a glass jar with a screw-top lid. You can do this with washed or unwashed blackberries – the key is making sure they are completely dry. I prefer to pre-wash the berries when storing this way, since it makes it easy to grab a few whenever you need them.
After washing the berries, let them air dry for a few hours to ensure that every bit of moisture has evaporated. This takes longer than you think, especially with all of the nooks and crannies in blackberries.
Then gently transfer the dry berries to a glass jar and screw the lid on. The jar keeps the blackberries from drying out, and keeps mold-producing moisture from getting in. As long as the berries are completely dry, that is. It’s a good idea to check the fruit a couple of hours after refrigerating – if there is any condensation on the berries, remove them and air-dry again.
Berries stored in glass jars can last two weeks or more. I live in a humid area, and berries typically go mushy for me in just a few days. Any hack that makes them last this long is worth the few extra steps!
Do you notice that your chilled blackberries have turned partially red? Learn why here: Blackberries Turning Red? Here’s What’s Happening.
In the Freezer
Freezing blackberries is a great way to save them for later use. You can substitute frozen blackberries in just about any blackberry recipe (one of my favorites is this Salted Honey and Blackberry No-Churn Ice Cream).
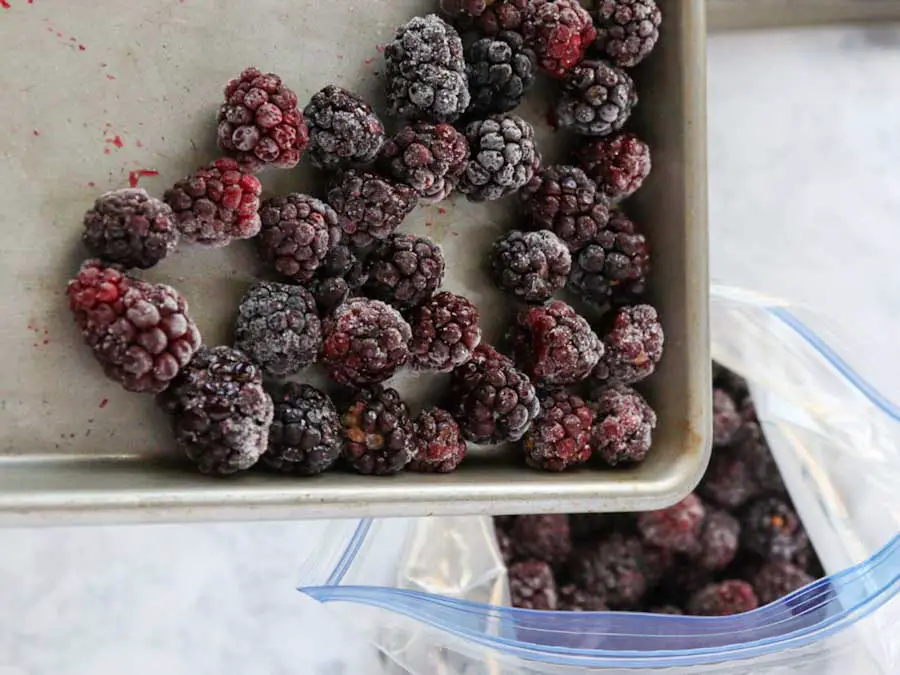
The procedure is simple. After washing and drying the berries as described above, spread them out in a single layer on a baking sheet (line with a Silpat to make sure they don’t get stuck). Freeze until the berries are solid. Then transfer the frozen berries into a gallon-sized freezer bag, labeled with the date.
To find out other great ways to freeze blackberries (and how to use them), check out: Freezing Blackberries: The Best Ways to Do It.
Other Ways to Store Blackberries Long-Term
When I have a large harvest of blackberries, I like to store them several ways. If you keep a mix of frozen puree, dehydrated blackberries, and various preserves on hand, as well as a stash of whole frozen berries, you’ll have what you need for any recipe for months to come. Here’s a quick rundown of how a few other ways to store blackberries:
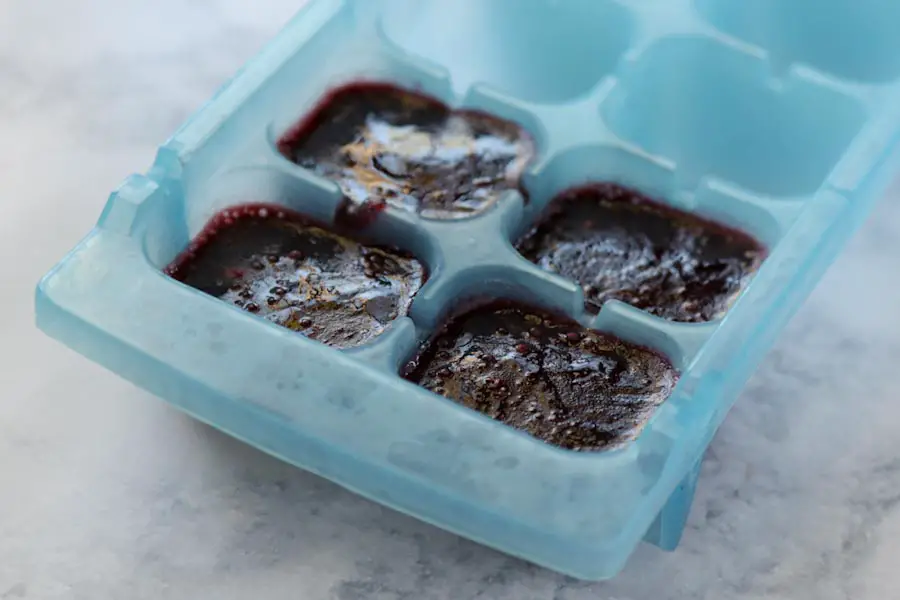
Frozen Blackberry Puree: Blend washed fresh blackberries in a blender or food processor until smooth. Press the blended berries through a fine-mesh strainer to remove the seeds. Pour the puree into ice cube trays and freeze solid. Transfer the frozen puree cubes to a freezer-safe bag or container.
Use the puree for seed-free smoothies. Mix defrosted blackberry puree with yogurt; or pour into a glass, add some simple syrup, ice, some lemon juice, and top with sparkling water for a fresh blackberry soda. You can also add blackberry puree to pancake batter or muffins.
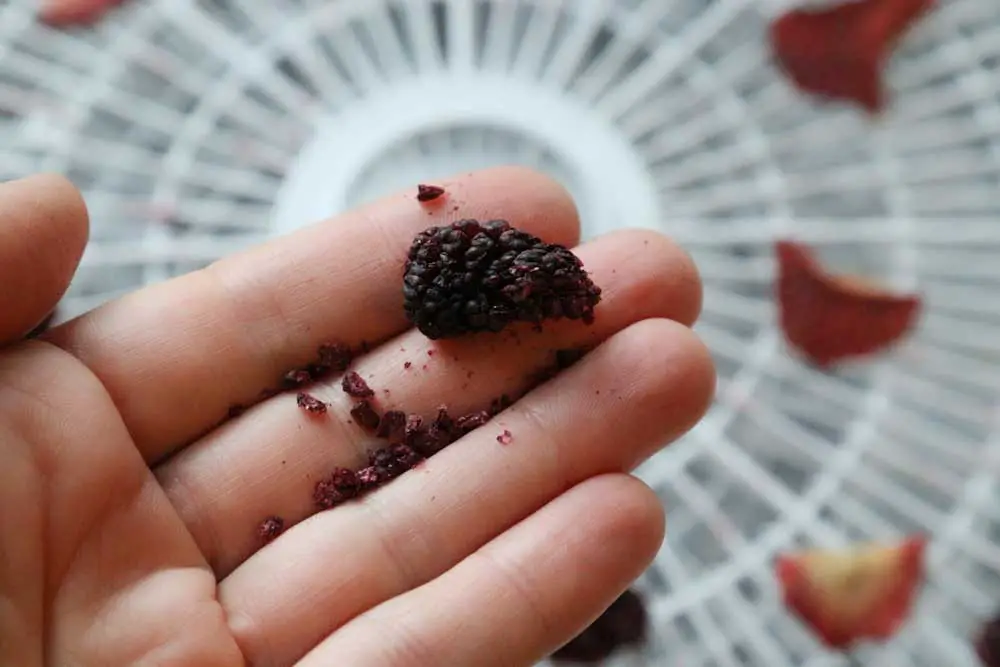
Dehydrated Blackberries: Spread washed and dried blackberries into a single layer on a food dehydrator tray. Set the dehydrator to 135°F and dry the berries for 12-24 hours, depending on the temperature and final desired texture. Store them in a sealed bag or jar in the pantry for several months.
Dried whole blackberries aren’t a great snack on their own because of the seeds. But, you can keep them on hand and use them to make a versatile blackberry powder.
Blackberry Powder: Do the same as with the dehydrated blackberries, but continue drying them until the berries are brittle and crumble when pressed (about 24-36 hours, depending on the size of the berries). Use a blender or coffee grinder to grind the berries into a powder. Sift the powder to remove the seeds, then blend again for a finer texture, if desired.
To make the powder last as long as possible, do one final step. Spread the powdered blackberry on a Silpat-lined baking tray. Preheat the oven to 170°F (or as low as it will go), then turn the oven off. Put the tray in the oven for about 15 minutes. This will remove any remaining moisture, which will extend the shelf life of the powder.
Use dehydrated blackberry powder within a month or two for the best flavor and freshness. Add it to smoothies or yogurt, or rehydrate the powder with hot water to make a quick puree.
This powder will have more texture than store-bought powders because it still contains all of the fruit fiber and sugar (which means more nutritional benefits!). You can use homemade blackberry powder in frosting or baked goods, but it may affect the texture a bit.
Watch the video below from The Purposeful Pantry for a detailed breakdown on making berry powder from dehydrated fruit.
Whole Canned Blackberries: Fill clean, sterilized canning jars with fresh, washed blackberries. Shake the jars gently so there is as little space as possible between berries. Cover the berries with hot sugar syrup (1 part sugar to 4 parts water for a light syrup, or 2 parts sugar to 3 parts water for a heavy syrup) water, or juice. Process the jars according to altitude and jar size. (See processing information and recipe details from the National Center for Home Food Preservation here.)
Low-Sugar Blackberry Jam/Preserves: Use 9 to 10 cups of whole berries, then mash them until you have 5 to 6 cups of crushed berries. Or, use a food mill or food processor to crush the berries, then strain out the seeds. Add them to a saucepan with 4 TBSP of no-sugar pectin and 2.5 cups of sugar. Bring the mixture to a full boil, then boil for about 1 minute.
Check the jelling of the jam using a cold spoon – if it doesn’t seem set enough, add a little more pectin and check again. You can also adjust the amount of sugar used, depending on how sweet your berries are.
Refrigerate the jam and use within two weeks. Or, preserve it: Carefully ladle the jam into hot, sterilized jars. Process them in boiling water for 10 minutes, or refer to the processing chart here for details for your altitude and jar size.
