We may receive commissions from purchases made through links in this post, at no additional cost to you.
I’ve always admired the look of beautifully espaliered fruit trees in gardening magazines and books. But I assumed that the task of training and maintaining an espalier was too difficult, and I was intimidated – until I just took the leap and gave it a try.
To my surprise, what I found was that setting up espaliered trees – in my case, apple trees – was not any more complicated than planting and caring for any other fruit tree. All it takes is some planning, initial setup, and patience.
When starting an espalier apple tree, choose a sunny location near a wall, fence, or open area with at least 8 feet of horizontal space. Set up strong support by attaching wires to the fence or wall or between sturdy posts. Prune the young tree just above a bud about 18 inches off the ground.
Adding an espaliered apple tree to any backyard or garden is not only possible, but highly practical. Espaliered trees take up far less space than freestanding trees, but they produce a much heavier apple harvest in proportion to their size.
Read on to learn exactly how to start and maintain a new apple tree espalier, from selecting the location and apple varieties, to setting up a support trellis, to planting and pruning throughout the first season.
Why espalier an apple tree?
Growing apple trees as espalier allows for maximum fruit production in compact spaces. By training the branches along a fence, wall, or freestanding trellis, the tree’s size stays in check. Pruning the tree a certain way allows for more fruiting wood and less vegetative growth for the tree to support.
Learn more: Espalier Fruit for Beginners: 10 Things to Know Before You Start

Espalier can also improve the flavor and size of the fruit. Spacing out the branches allows more sunlight and air to reach each apple, which means more sugar development. The increased air circulation can also reduce disease and pest problems.
Harvesting is far simpler with an espaliered apple tree. Freestanding semi-dwarf apple trees can grow to be 15 to 20 feet tall, and many full-sized varieties will grow to 30 feet or more. An espaliered tree is typically pruned to stay under about 8 feet, which makes for much easier harvesting.
And of course, an espaliered fruit tree is a highly ornamental feature in any garden. An apple espalier will be a big conversation starter, whether it’s set up as a focal point or just filling in an empty bit of fence.
Watch the video below to see exactly how I set up my own backyard espalier apple tree:
How to Start an Espalier Apple Tree
Step 1 – Choose a Location and Design
Any apple tree needs full sun in order to produce fruit, so choose a spot that gets at least 6 to 8 hours of direct sunlight. The soil should be fertile and well-drained (avoid heavy clay soil that become easily waterlogged).
You can have freestanding espaliered trees, as long as you have the space and set up a very strong trellising system of sturdy posts and wires. Historically, espaliered trees were often planted and trained as a living fence.
For the purposes of this guide, I will be focusing on setting up the support trellis against a sturdy fence or wall. You will need at least 8 feet of linear space from end to end.
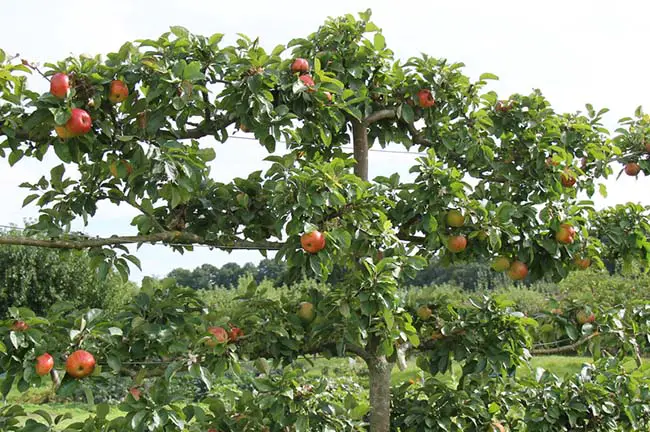
I’ve chosen a simple horizontal cordon design for my apple trees, but there are many ways to set up an espalier trellis.
A cordon-style espalier is typically 6 to 8 feet tall with 3 or 4 sets of horizontal branches. I’ve set mine up with 3 horizontal support wires that are 8 feet across, and I’ve left space to add a fourth tier on top as the tree grows.
Step 2 – Gather Supplies
Apple Trees for Espalier
The best apple trees to espalier are those that are spur-bearing (as opposed to tip-bearing or partial tip-bearing). This means the apples will grow on short branches, or spurs, that grow off of the main branches. Spur-bearing apple trees allow for more apples to grow along the horizontal branches of the espalier.
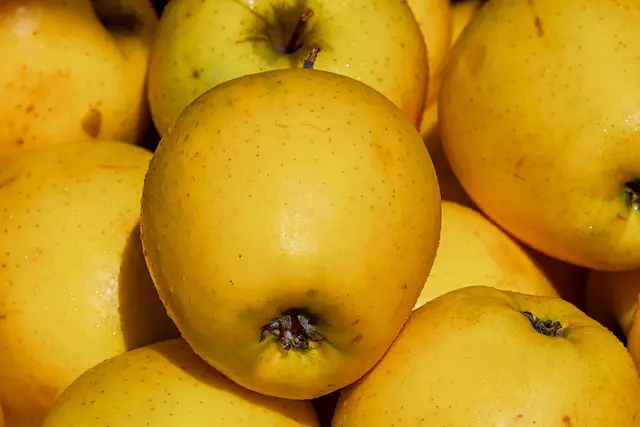
There are many apple cultivars for just about every climate that work well for espalier. Some common varieties to use include ‘Golden Delicious’, ‘Braeburn’, ‘Ambrosia’, and ‘Liberty’.
I put together an extensive list of spur-bearing apple varieties that are ideal for espalier, including which are suited for different growing zones here: 50 Apple Varieties for Espalier: How to Choose the Right One.
Bear in mind that many apple trees are not self-pollinating, so two trees may be needed in order to produce fruit. There are some self-pollinating apple varieties, including ‘Golden Delicious’, ‘Ein Shemer’, and ‘Divine’, but even these will have an improved harvest if there is a second tree nearby.
It’s best to choose a dwarf or semi-dwarf apple tree, or one that is grafted onto dwarf rootstock. You can successfully espalier a full-sized tree, but the branches may be thicker and take a little longer to train. You may also need to prune more aggressively to maintain the size. A dwarf or semi-dwarf tree will have more supple branches and will naturally stay more compact.
If possible, look for a young (1- or 2-year-old) tree that just has a single upright trunk or whip and no branches. Unbranched whips can typically only be found at specialty nurseries or mail-order/online nurseries.
You can use any young apple tree as long as it has a single, slender trunk with plenty of buds on it. You’ll be pruning off the top of the tree or whip once it’s planted. Make sure there is a bud that’s about 16 to 18 inches above the soil line, with at least 3 buds below it.
You can use either a potted or bare-root tree. Bare-root trees tend to have fewer issues with transplant shock since they are shipped when they are dormant, but they must be planted right away. Potted trees give you a little more flexibility with planting time, but you have to make sure they establish well in the ground.
For my backyard espalier, I chose ‘Ein Shemer’ and ‘Anna’, two semi-dwarf, spur-bearing varieties that are well suited to my hot climate (USDA zone 8b). ‘Ein Shemer’ is self-pollinating, but I planted ‘Anna’ as well to increase my apple crop.
You can espalier two pollinating trees in different locations, as long as they are within about 100 feet of each other. I’ve set up my trees right next to each other between two 8-foot sections of fence.
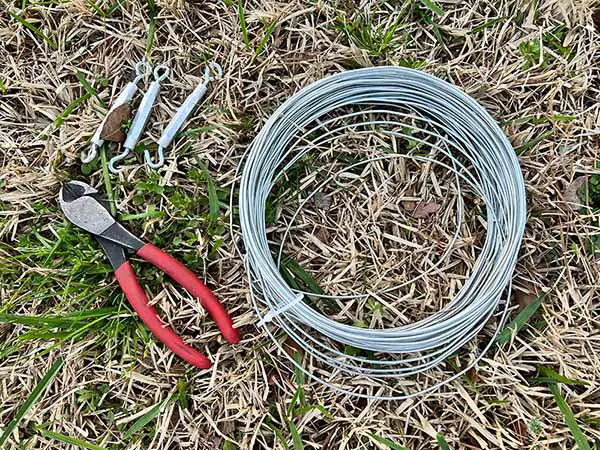
Supplies List
Here’s what you need to gather for a 3-tier cordon trellis along a fence or wall:
- Apple tree(s)
- 12- or 14-gauge galvanized wire – about 35 feet per tree.
- 11 three-inch (or longer) eye screws for wood, plus rawl plugs or masonry anchors if you are attaching the trellis to brick or concrete. The support wires should sit at least 2 inches away from the wall or fence to allow plenty of air circulation around the plant.
- 4 hook-and eye turnbuckles – one for each horizontal and vertical wire. Look for one end to be a closed eye (for attaching the wire securely) and the other a hook (to easily attach to the eye anchored on the fence or wall). The wires will loosen over time as the tree grows and supports heavy fruit, so it’s important to have an easy means of tightening the wires as needed.
- wire cutters
- pliers
- drill – including drill bits for pre-drilling holes for the eye screws, or masonry bits for a brick wall
- measuring tape
- pencil or chalk
- shovel
- compost or other soil amendments
- stretchy plant ties, twine, or pantyhose
- 6-foot bamboo stake (one for each tree)
- zip ties
- heavy-duty pruning shears or loppers
- (optional) a 6-foot 2×4 and some deck screws
Step 3 – Set Up a Support Trellis
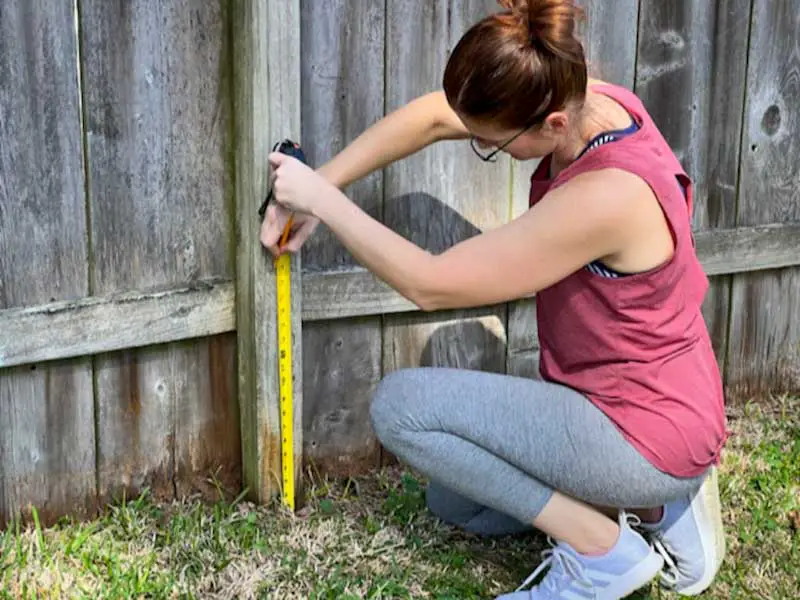
Measure and mark the framework of the trellis. Starting at the spot where the tree will be planted, measure up 18 inches from the ground, and make a mark. Continue marking two more tiers every 18 inches. (If vertical space is limited, the tiers can be placed 16 inches apart.) Do the same thing 4 feet to the left and 4 feet to the right of the center. You should have 9 marks on the fence or wall – three vertical rows spaced 4 feet apart, with marks at 18, 36, and 54 inches off the ground.
Because I’ve set up my espaliers between posts on two 8-foot sections of fence, I needed to add a center support for my trees. Using some deck screws, I attached a 2×4 in the center of two fence posts. This 2×4 marks where my apple trees will be planted gives me a place to attach the eye screws to support the center vertical wire.
Attach the eye screws. Pre-drill holes where you have marked the wall, plus two more holes at the bottom and top of the central vertical line (to attach the wire). If drilling into masonry, insert an anchor or rawl plug into each hole. Screw in the eye screws at each hole, leaving at least 2 inches of space between the eye and the wall or fence (for air circulation).
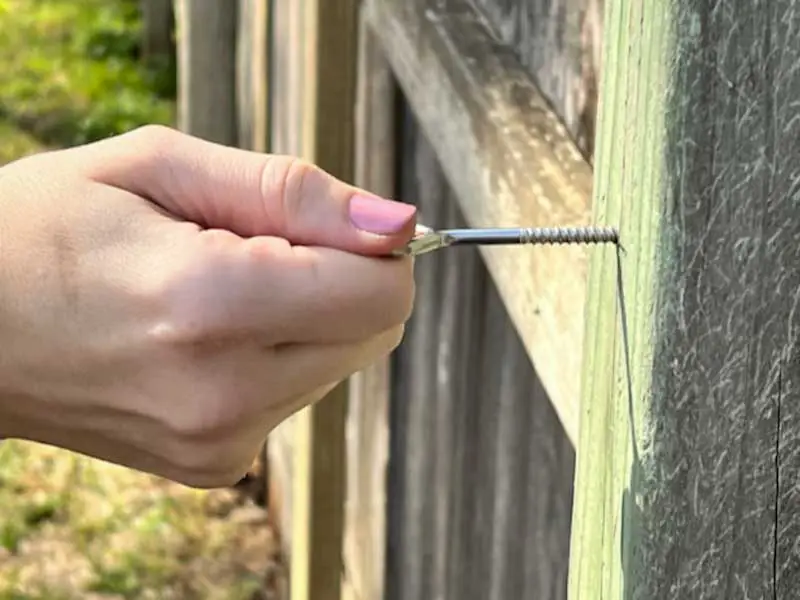
I oriented the end eyes horizontally so I could tie in the wires and the middle eyes on an angle so I could run wires both vertically and horizontally. I added an eye to the top and bottom of the central part to tie in the vertical wire.
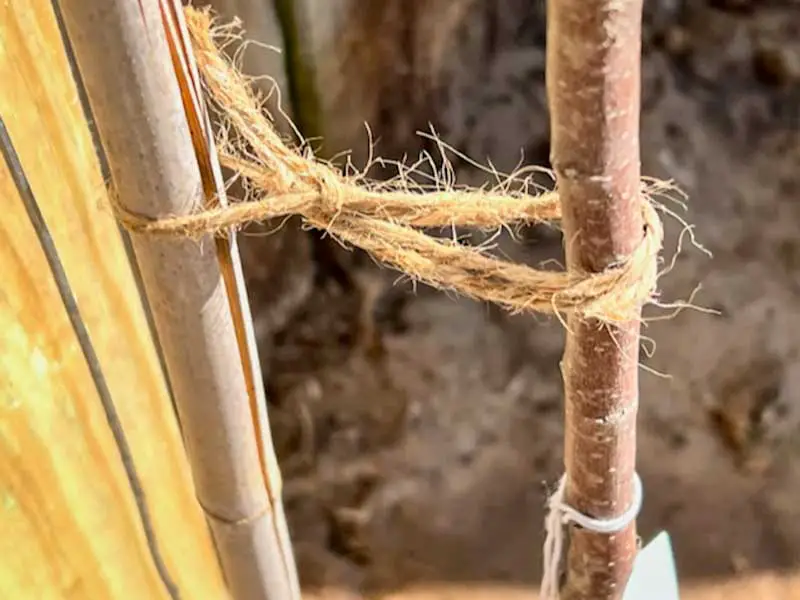
Attach and tighten the wires. Measure and cut at least 8 feet of wire for each horizontal tier (the length of the tier, plus a little more wire for twisting). Starting at the bottom tier, thread the end of one wire through the eye hole. Bend the wire back onto itself, and use the pliers to twist the wire to secure it. Thread the other end of the wire through the bottom tier eyes.
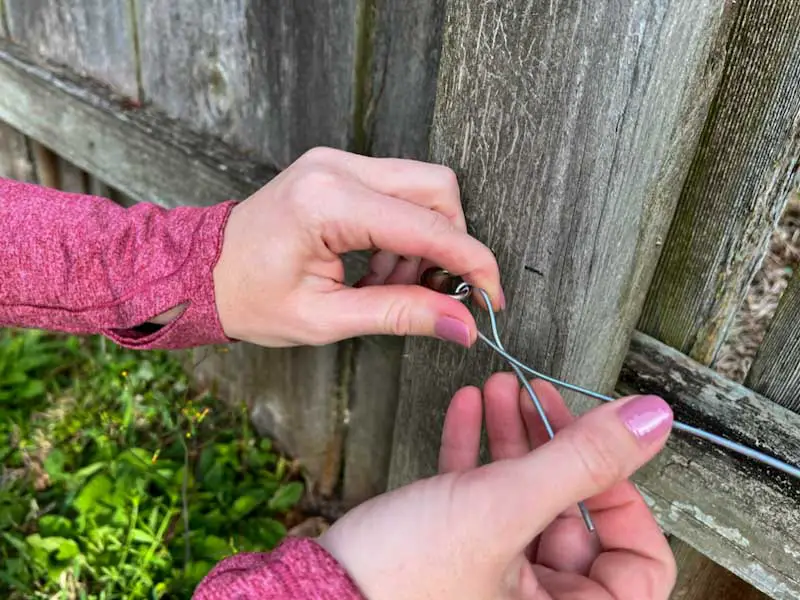
At the opposite end, attach a loosened turnbuckle to the eye screw. Thread the end of the same wire through the eye of the turnbuckle, then twist to secure. Manually tighten the turnbuckle (use a wrench if necessary) until the wire is taut, but not over-tightened.
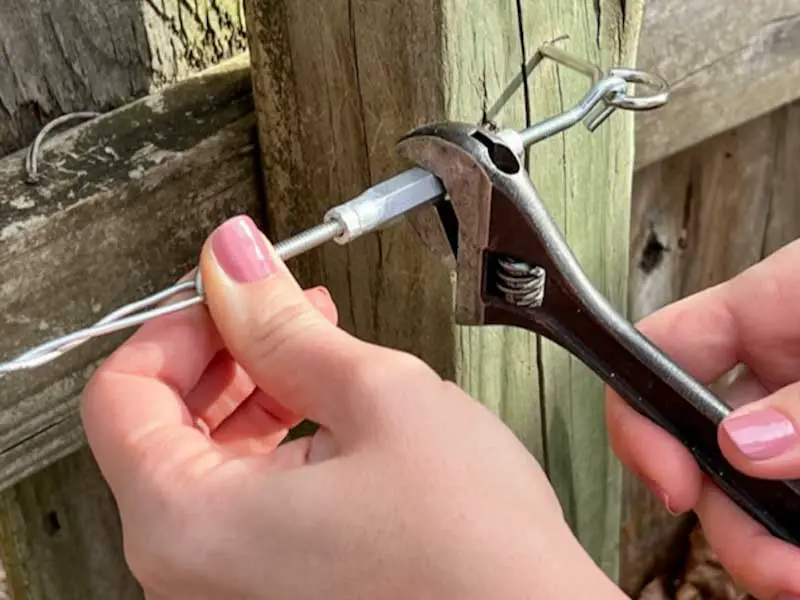
Continue the same process with the other horizontal tiers, running each wire through the central eyes for support. Attach, thread, and tighten the center vertical wire to the eye screws you attached at the top and bottom of the fence or wall.
At this point, you should have a secure, fully set-up espalier trellis, with one central vertical wire and three horizontal wires crossing it at 18-inch intervals.
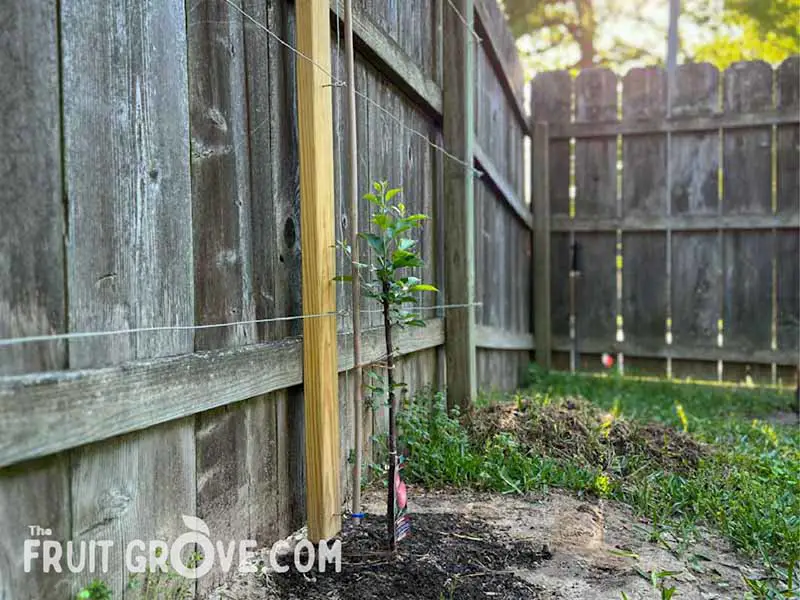
Step 4 – Plant the Tree
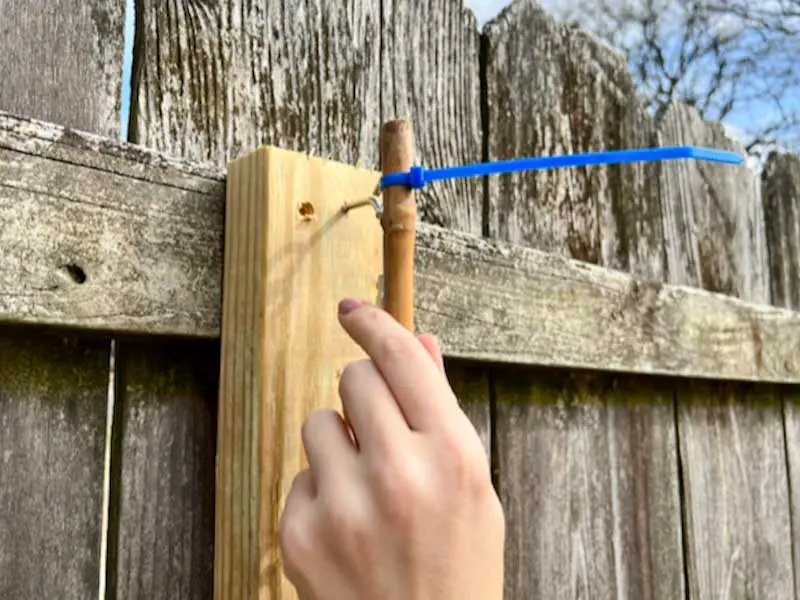
First, attach the bamboo stake to the center vertical wire using zip ties or twine. The stake will make it easier to gently attach the trunk to the center support. Attaching directly to the wire could damage the young bark of the tree.
Dig a hole just in front of the center vertical wire. If your tree is potted, make the hole two or three times wider than the nursery pot. For a bare-root tree, be sure to soak the roots in water for at least a couple of hours (no more than 24) before planting, then dig a hole about 2 feet in diameter.
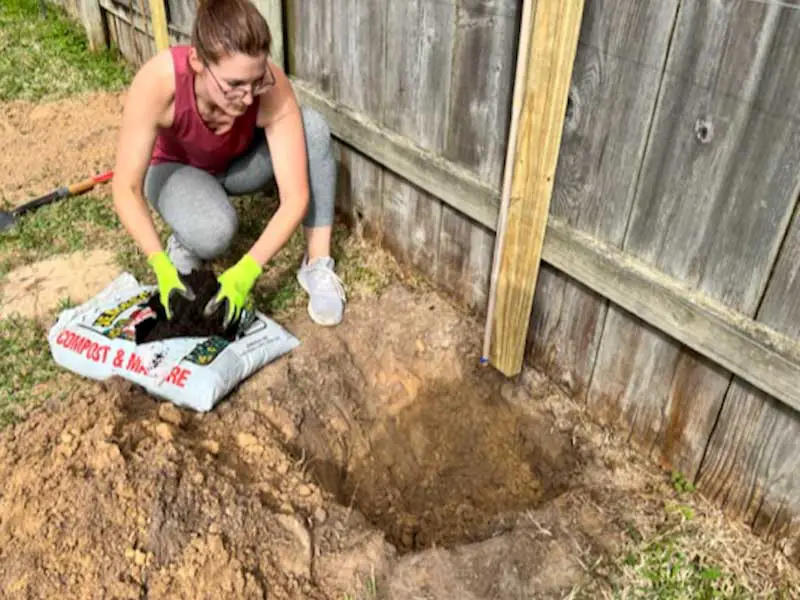
If desired, mix in up to 50% compost or other soil amendments with the native soil. Remove the tree from the pot, then place into the hole. The top of the root ball should sit right at or just under the soil level, so add some dirt back into the hole to reach the proper height. If your tree is grafted, check that the graft union is 3 or 4 inches above the ground.
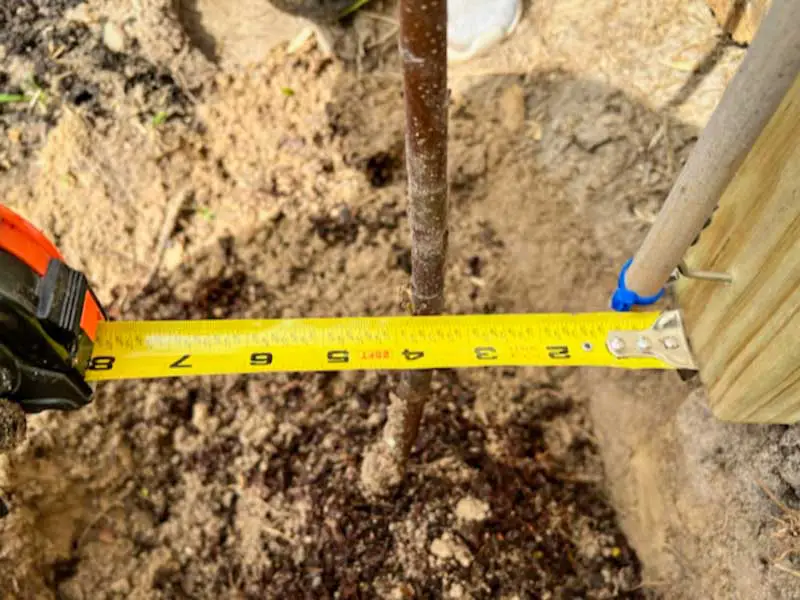
The trunk or whip should sit about 4 inches away from the vertical wire and bamboo. Look for a bud to be placed just above the first horizontal tier wire.
As soon as you are happy with the placement of the tree (make sure it’s straight!), backfill the hole with the native soil/compost mix. Tamp down as you go to remove any air pockets.
Using twine, a stretchy plant tie, or even something like pantyhose, gently tie the trunk to the bamboo stake. I used a piece of twine, wrapped it in a figure-8 around the trunk and stake, and then tied two slip knots so I could loosen or tighten as needed.
Give your newly planted apple tree a good soak of water. Be sure to water the tree regularly as it is getting established.
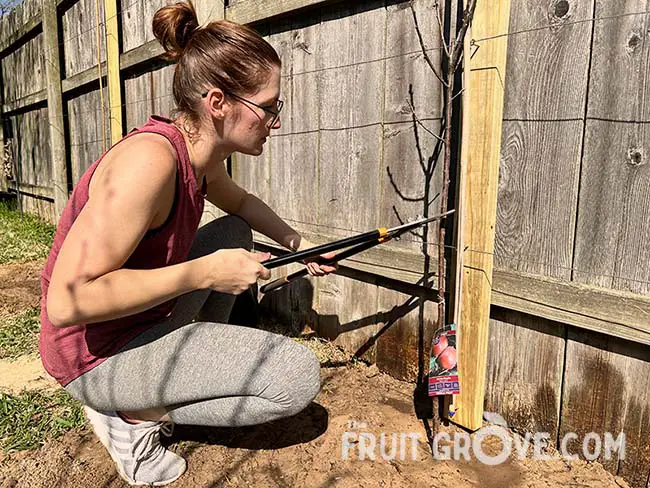
Step 5 – Pruning
This is the big moment – time to make the first of many pruning cuts to come. Find the bud that’s located right above the bottom tier wire. Check to make sure there are at least 3 buds located under this bud.
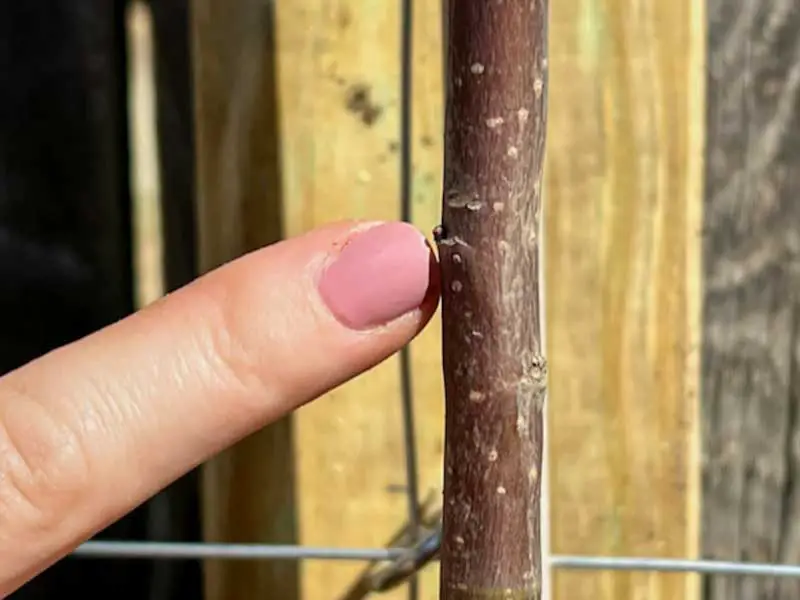
Pruning the top of the tree will force the top few buds to grow new branches. The top bud will become the new central trunk, and the buds underneath will grow into the horizontal branches that will be trained along the wires.
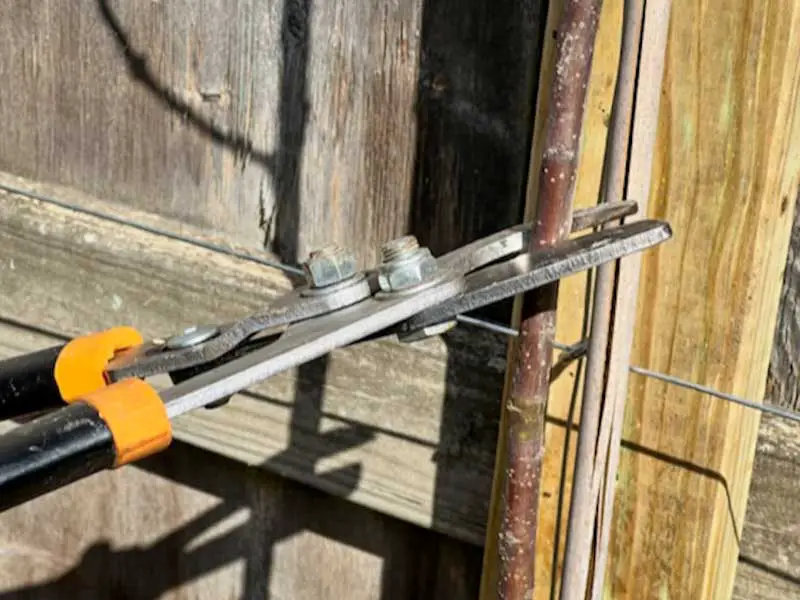
Take a deep breath, and using heavy-duty pruning shears or loppers, cut the whip or central trunk 1 to 2 inches above the bottom tier wire, just above a bud. Then just wait and watch those buds grow into leafy shoots.
Once the horizontal shoots are long enough, loosely tie them to the horizontal wires on the bottom tier. Keep the new center shoot trimmed to about 6 inches until the horizontal branches have reached about 3/4 of the way down the support wires.
Then allow the central trunk to grow a few inches past the second-tier wire, and make another topping cut just above a bud to force the next level of horizontal branches.
During the first few seasons, pinch off any blossoms that appear on the tree. As much as it would be nice to get a couple of apples early on, the tree needs all available resources to establish a root system and grow to fill the trellis. Before long, you’ll have more apples than you know what to do with.
