We may receive commissions from purchases made through links in this post, at no additional cost to you.
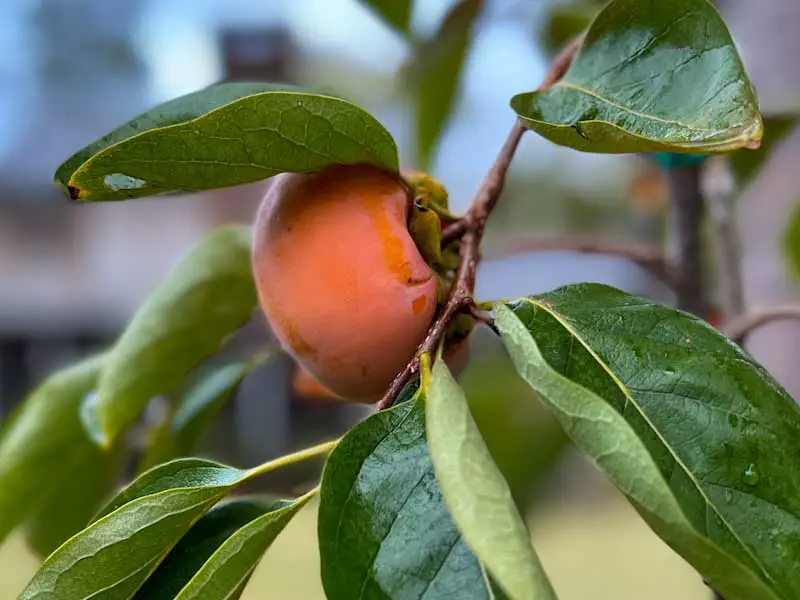
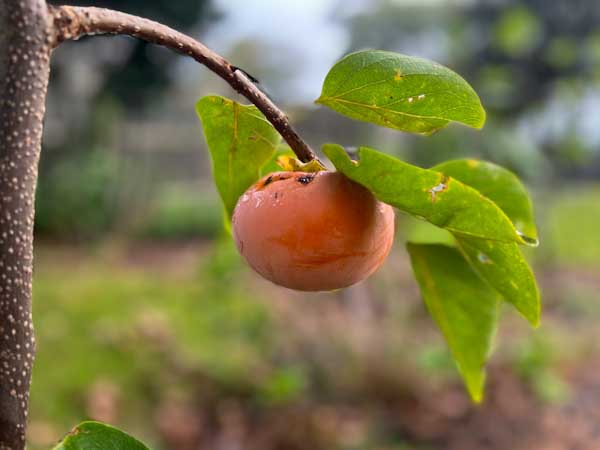
When I’m planning my garden and landscape, there are times when I have a specific spot to fill, so I go to the nursery to look for a plant that belongs in that spot. But other times, such as when I bought my persimmon tree, I fall in love with a plant at the nursery and then have to find it a home in my garden.
Thankfully, persimmon trees aren’t quite as picky as some other fruit trees. But even so, your tree will be happier in the right location, and will establish better if planted at the right time. So when and where is best when planting a persimmon tree?
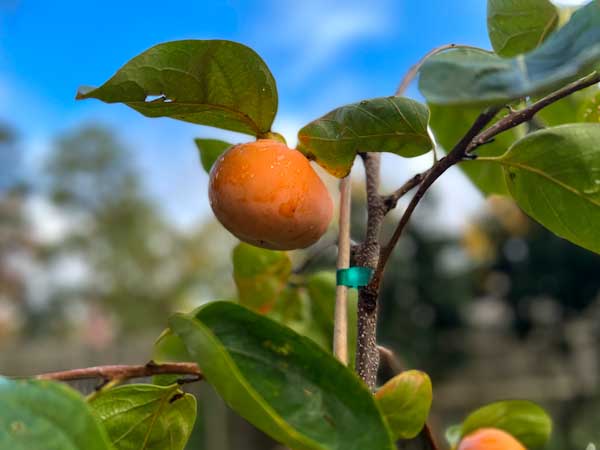
Persimmon trees should be planted in full sun. They prefer well-drained, fertile sandy loam with a pH of 6.0 to 7.0, but they can tolerate a wide range of soil conditions. Plant persimmon trees in spring after the last frost, or in fall at least 6 weeks before the first frost.
The first step in growing any fruit tree successfully is finding the right place for it. The more care you take when planting a persimmon tree, the easier it will be to maintain, and the quicker you will see the (literal) fruits of your labor. Let’s take a look at the best location, time, and method for planting persimmon trees.
What’s the best location for a persimmon tree?
Sun
Persimmon trees need at least 6 to 8 hours of full sun to grow and fruit their best. Choose a location that gets a good amount of direct light for most of the day, although they will tolerate some afternoon shade.
I lve in a hot climate, and I’ve noticed that my fruit trees do better when they are somewhat sheltered from the blistering late-afternoon sunlight. I’ve got a persimmon tree planted in an open part of the yard, but in the afternoon it’s in dappled shade from tall pines.
Drainage
Unlike many pickier fruit trees, persimmons can adapt to a wide range of soil conditions. Ideally, a fertile, well-drained, sandy loam is best. But even if you aren’t one of the lucky gardeners with perfect soil – which I certainly am not – you can still successfully grow a persimmon tree. (Read Why Grow a Persimmon Tree? Here’s 10 Great Reasons for more reasons to love these easy-to-grow trees.)
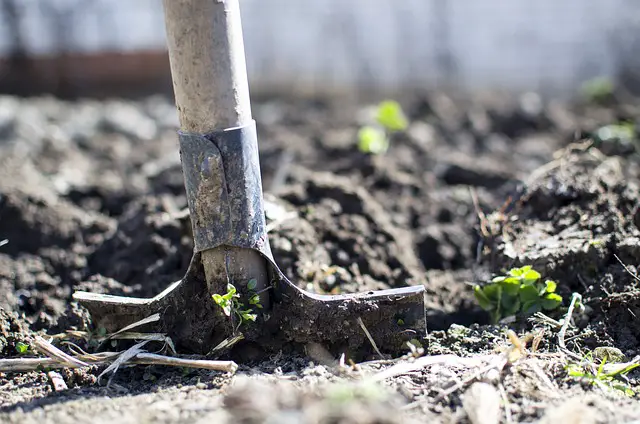
Before choosing a site for your persimmon tree, test the drainage:
- Dig a 1-foot wide by 1-foot deep hole.
- Fill the hole with water, then let it drain.
- Fill the hole with water again, then watch to see how fast it drains this time.
- If the water soaks in more quickly than one inch per hour, then the site may be too dry.
- If the water drains more slowly than one inch per hour, then it may be too wet.
The good news is, you can amend the soil to somewhat correct these issues. For sandy, fast-draining soil, mix in a combination of compost, topsoil, or peat moss to help water retention and to provide more nutrients to the growing roots. You may need to fertilize a little more often in sandy soil as well, since nutrients drain away more quickly than the roots can absorb them.
With heavy clay or lean soil, mix in compost at up to a 50% ratio with the native soil. This will break up the compacted clay and give the roots somewhere to spread.
Soil Acidity
Persimmon trees prefer slightly acidic to neutral soil (a pH of 6.0 to 7.0), although they can tolerate soils somewhat outside of this range. Test the acidity of your planting site with a simple pH testing kit like this one.
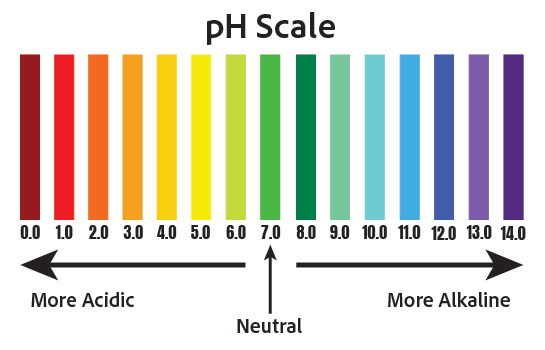
To make the soil more alkaline (a higher pH), add some garden lime. To increase the acidity (lower pH), add a sulfur-based product such as this soil acidifier. Always follow package instructions for how much to use and how best to apply it.
Spacing
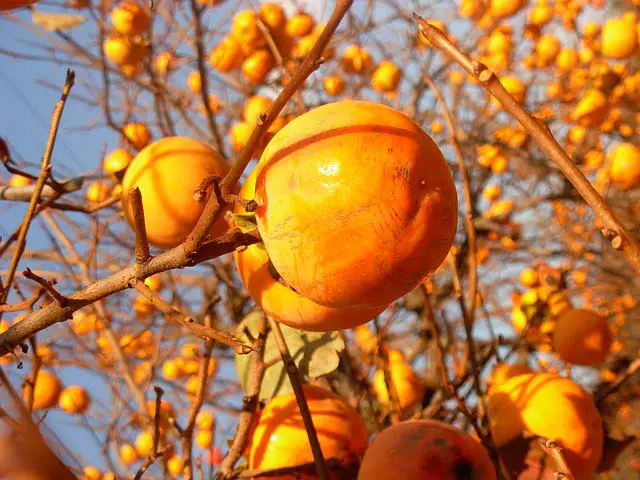
The spacing of your persimmon trees largely depends on the variety you are planting and what you are trying to accomplish in your garden. American persimmon trees grow much larger than Asian varieties, so give these trees at least 30 to 50 feet of space. Asian persimmons typically need about 15 to 20 feet. Some dwarf varieties, such as ‘Ichi-ki-jiro’ only need 8 to 10 feet to grow.
Check out How Big Does a Persimmon Tree Grow? for more info about the potential size of your tree.
The eventual maximum size of the persimmon tree will determine exactly how far it should be spaced from other trees. Take into account whether your variety is self-fruitful (as many Asian varieties are), or whether there need to be two trees for fruiting (as with most native American varieties).
You can prune your tree to keep its size in check, however. If you want to keep the tree more compact so the fruit is reachable, then you can plant the trees a bit closer together. Some root competition may actually help the tree to stay a little smaller. To learn step-by-step how to prune an Asian persimmon so it doesn’t get too tall (and to help it fruit better), check out this article.
When should you plant a persimmon tree?
Plant persimmon trees in the spring after the last frost date, or in the fall at least 6 weeks before the first winter frost. The soil needs to be warm enough to be workable for spring planting. In the fall, plant early enough that the trees’ roots can get established before winter sets in.
In my hot southern climate (USDA zone 8B), I prefer to plant fruit trees in the fall. When I plant new trees in spring, I find it much harder to keep the young tree adequately watered during summer’s heat. I find that planting in the early fall gives the tree a better chance of getting established before going dormant for our shorter winter.
In northern climates, planting a persimmon tree in the spring after any danger of frost might be better. The tree’s roots can get established over the spring and summer before the harsh winter cold. If you plant in the fall, you may need to take some precautions to protect the young tree over the winter.
Related: Persimmon Trees are for Cold Climates Too (15 Trees to Try)
When you buy a persimmon tree from the local nursery, it will probably come in a pot. A tree ordered online may come in a pot, but more likely it will be a bare-root tree.
A bare-root tree should be planted right away before the roots have a chance to dry out too much. They have a narrower planting time than potted trees since their roots are more susceptible to drying. It’s best to plant bare-root trees in mid-spring (before the buds break), or mid-fall (after the leaves have fallen).
With a potted tree, you have a little more flexibility as to planting time. A young persimmon tree can survive in its pot for months if you are careful to water it regularly. But the sooner you get it in the ground, the sooner it establishes…and the sooner you get to eat home-grown persimmons.
How to Plant a Persimmon Tree
Whether your tree is bare-root or potted, the process of planting is simple. Container-grown saplings may give you a head start in terms of size, but they can experience shock unless care is taken in planting. Bare-root trees are shipped when fully dormant and tend to have less planting shock, but there are a few differences in the planting procedure.
Below are step-by-step instructions for planting any persimmon tree:
Planting a Potted Persimmon Tree in the Ground
- Dig a hole 3 or 4 times the width of the pot, and about as deep as the pot. As you dig, put the native soil in a wheelbarrow, on a tarp, or next to the hole for easier backfilling.
- Mix in compost or other soil amendments if necessary. Always mix these in with plenty of native soil. You want the tree to adapt to the soil in your garden, even if you add nutrients and other amendments to the planting site.
- Unless the soil is very lean, there is no need to fertilize at planting. Young persimmon trees can be sensitive to fertilizer. It’s best to wait a year or so and see how the tree does. If the leaves are dark green and the tree is growing about a foot per year, then there’s no need to fertilize at all. If you notice lighter leaves or slow growth, fertilize in the spring with an organic fruit tree fertilizer such as this.
- When the hole is dug, grip the base of the tree and gently remove it from the pot (if necessary, cut the pot away). With your hand, gently loosen the small feeder roots around the root ball.
- Place the tree so that the root ball is 1-2 inches above the soil line, so that when the soil is tamped down the root ball is level with the ground. Backfill the hole halfway, tamping down as you go, then soak the soil with water. Continue filling and tamping down air pockets. Don’t put any soil on top of the root ball to avoid suffocating the young tree. It’s important to keep the graft union a couple of inches above the soil line.
- Water in the tree thoroughly, even if the ground is already damp, to settle the soil around the root ball. Continue watering regularly throughout the first year of growth (1 to 2 times per week, depending on rainfall, climate, and soil type).
- Mulch the tree with 4 to 6 inches of pine bark, weedless straw, or other breathable organic material. Keep the mulch a few inches away from the base of the trunk for air circulation.
- Stake the tree to protect it from strong winds. Place a tree guard around the base of the trunk to keep animals from chewing on the young bark and to protect it from sunscald.
Planting a Bare-Root Persimmon Tree
- Prune the top of the tree by up to half its size so that the top growth is balanced with the roots. Once planted, the tree needs to put its energy into developing a healthy root system rather than supporting a large canopy.
- Soak the roots for at least 12 hours to fully hydrate the tree. Do not skip this step! The better the roots are hydrated, the less water they will lose once in the ground, decreasing the chance of shock.
- Dig a roughly 2-foot by 2-foot hole. Amend the soil as necessary (although do as little as possible, as it’s better for the tree to adjust to the native soil).
- Spread out the roots at the base of the hole. Plant deep enough so that the graft union is 2 to 3 inches above the soil line.
- Backfill, tamp to remove air pockets, and water in as described above.
